by Florian Cramer
You can achieve Foveon-like images with deep colors and crisp individual pixels with your conventional (Bayer) camera. However, this comes at the price of losing 75% of your megapixels and having to work experimentally and outside the comfort zone of your camera manufacturer’s color science. Read on if you want to know how.
Owners of Foveon and 3-chip video cameras swear by their cameras’ color reproduction, for good reason. Other, conventional digital camera sensors can’t see true colors, but only record monochrome red, blue, and green pixels. In other words, a 24-megapixel camera with a conventional (Bayer) sensor doesn’t really record 24 million color pixels, but 6 million monochrome red, 6 million monochrome blue and 12 million monochrome green pixels. On the sensor, they are grouped as follows:
The colors we see in the final 24 megapixel image were algorithmically guessed from this monochrome pixel grid. Foveon and 3-chip cameras, on the other hand, record true colors per pixel because their sensors can see red, blue and green simultaneously. Since no algorithmic reconstruction is required for the recorded pixels, both their color reproduction and per-pixel sharpness are unique.
But we can achieve a working equivalent of true color pixel capture for conventional Bayer sensor cameras - if we are willing to sacrifice megapixels in the final image. The idea is strikingly simple: If we don’t treat the four monochrome red + green + green + blue pixels of a Bayer sensor as four individual pixels, but mix them down into a single pixel, then that pixel will have true color, not the reconstructed color of conventional debayering and its algorithmic guesswork. Maybe no one has seriously considered this alternative approach yet because photographers wouldn’t have sacrificed their megapixels in the past. Nowadays, where 24-48 megapixels cameras are the norm, this alternative method comes with fewer drawbacks. 6-12 megapixel images can still be very usable.
This alternative process can be done quite easily with the Open Source software programs RawTherapee and Gimp or Darktable. Of course, it not only bypasses conventional raw debayering, but also camera manufacturers’ color science. Instead, we now create our own completely DIY raw processing and color science. (Note that this process only works for Bayer sensor cameras, not Fujifilm X-Trans cameras whose red/green/blue sensor filter pattern is larger than 4x4 pixels).
To describe the “Foveon-like” Raw development process in a nutshell:
Finally, we re-import the TIFF file and apply the usual visual corrections (white balance, exposure/contrast, optionally noise reduction) to give the image its intended look.
We need either RawTherapee or Darktable because they are the only raw developers (known to us) that can display and export raw images as unprocessed, undebayered red/green/green/blue pixel images. The two programs are available for all major desktop operating systems (Windows, macOS and Linux). If you’ve never worked with them before, it might help that RawTherapee’s interface resembles DxO Photolab and Capture One, while Darktable’s interface might be more familiar to Adobe Lightroom users.
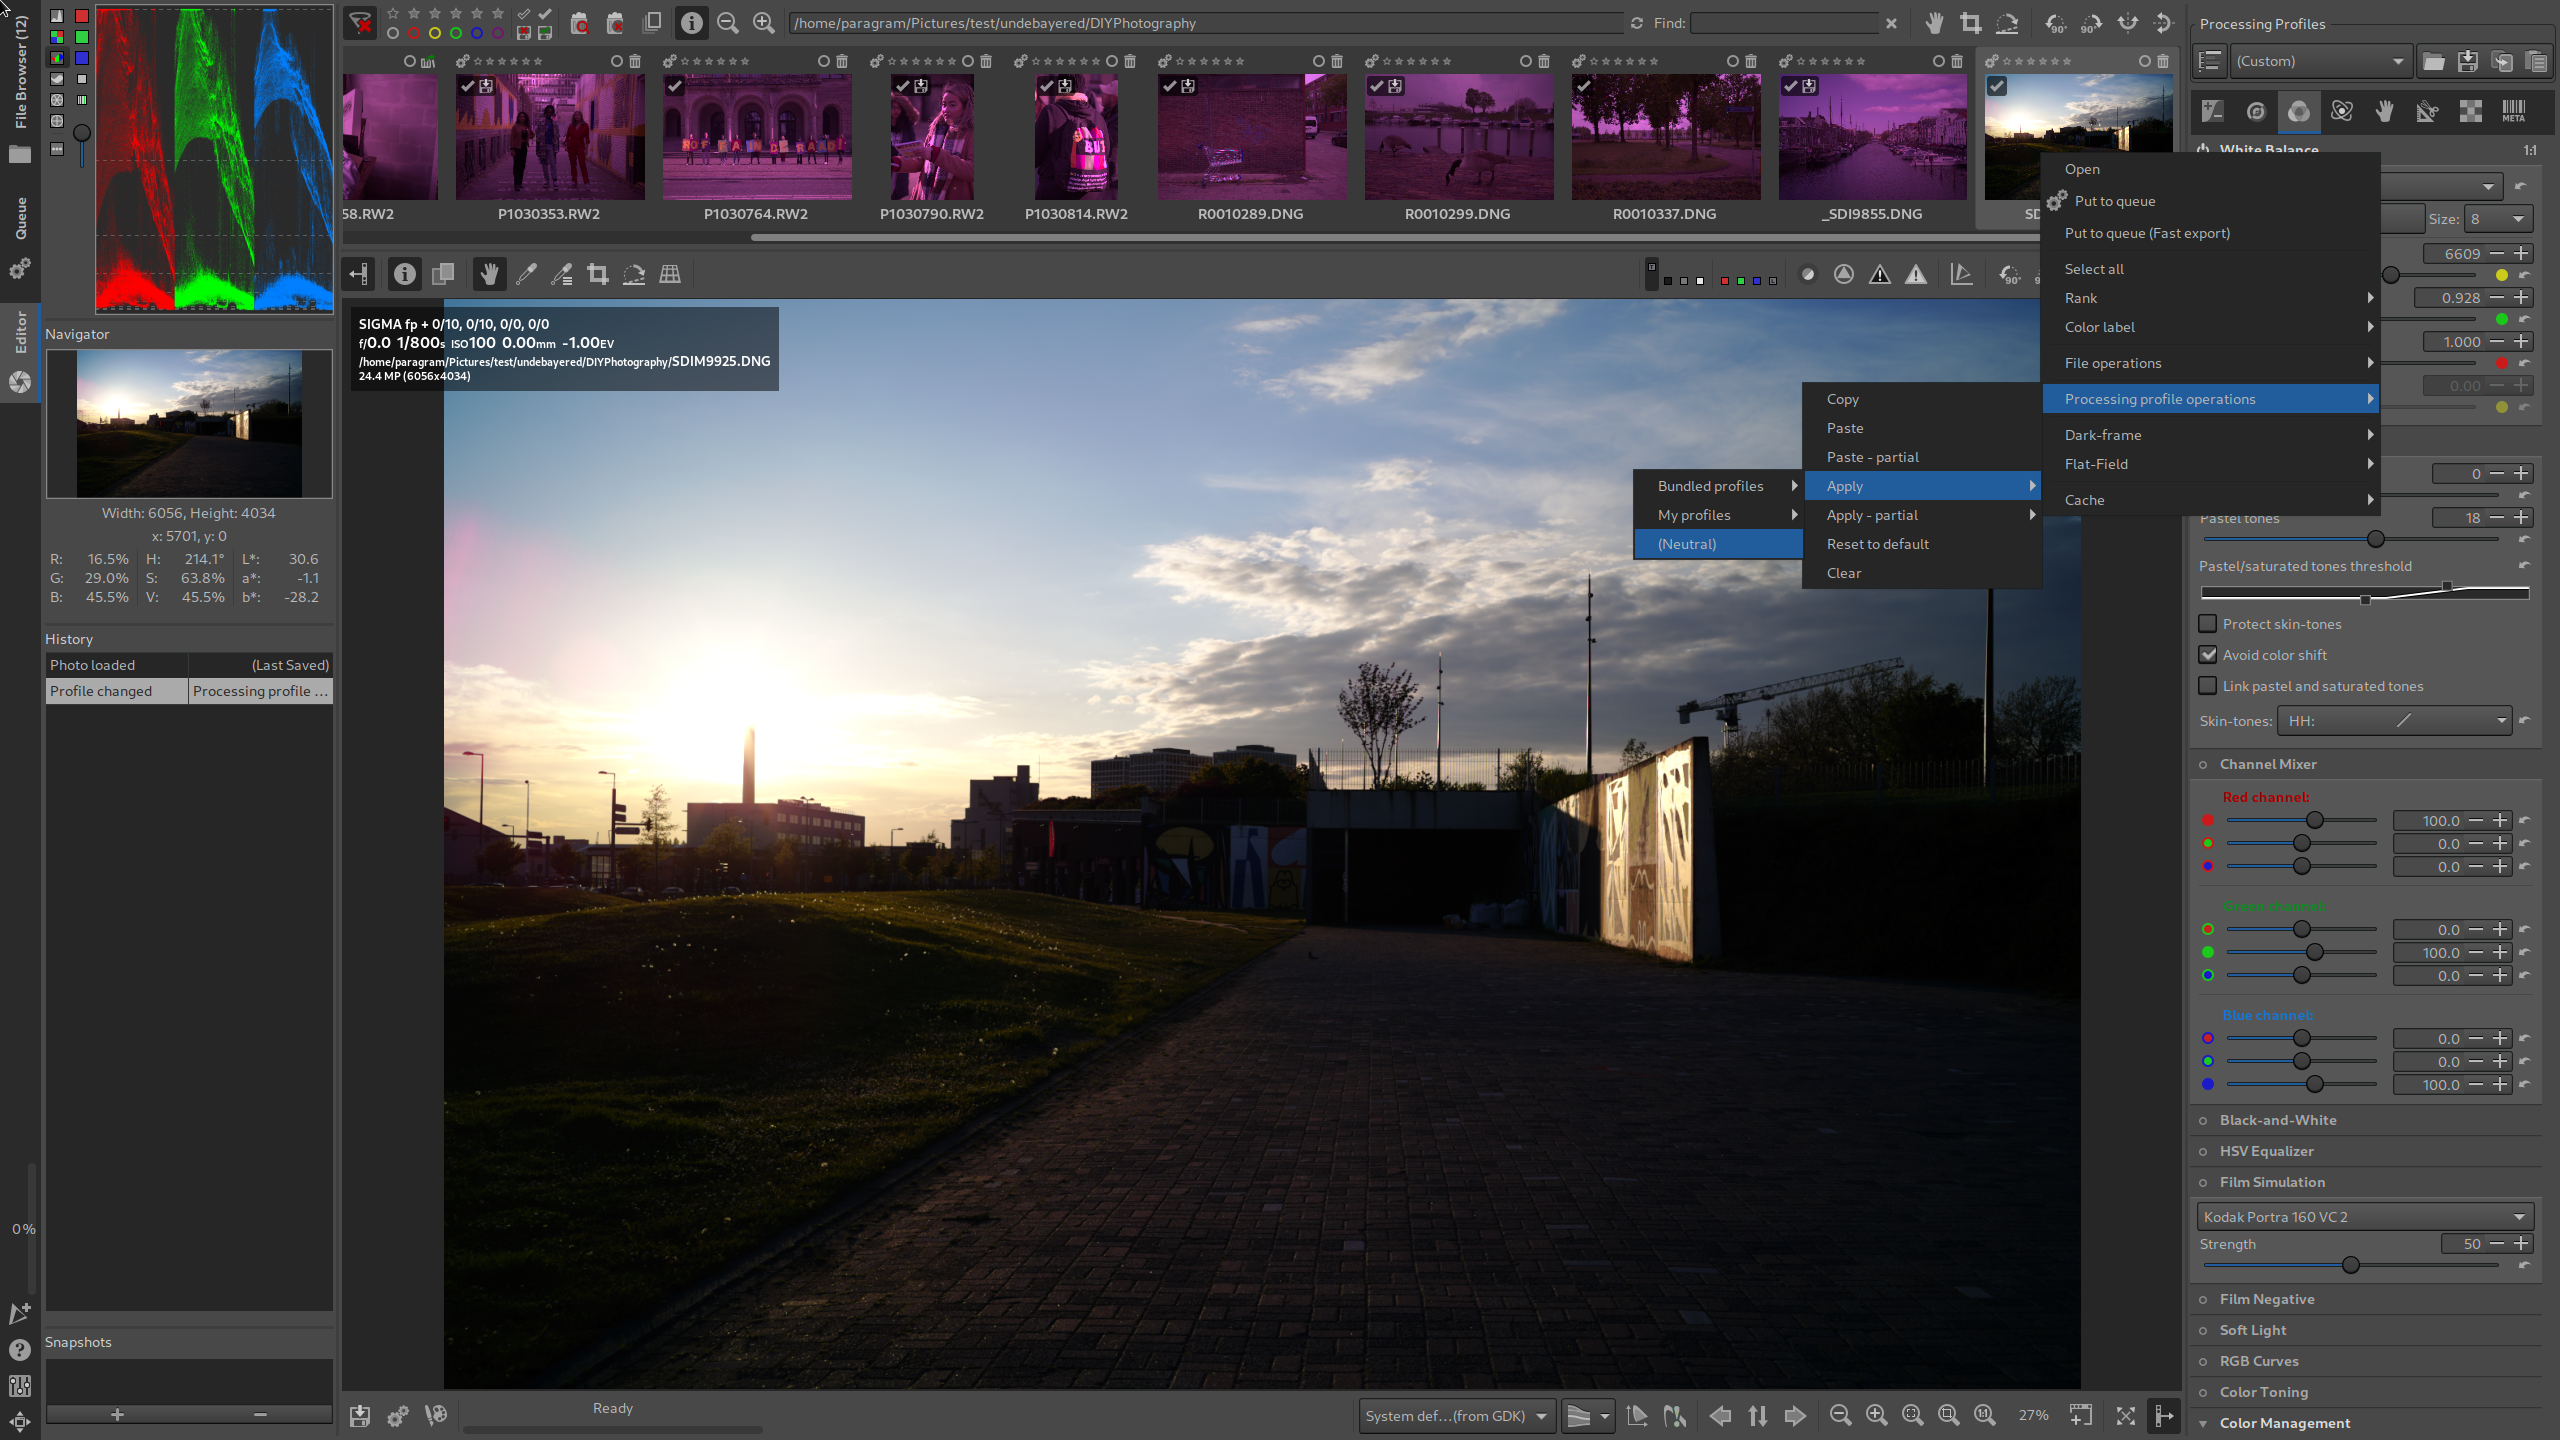
Launch RawTherapee. Use the “File Browser” (top tab in the upper left corner of the screen) and go to the folder with the raw image you want to process. Double-click the thumbnail of the image on the right to open it in the editor. Right-click on the thumbnail in the scroll bar at the top of the screen and select “Processing Profile Operations -> Apply -> (Neutral)”. This will turn off all image processing except debayering and camera white balance.
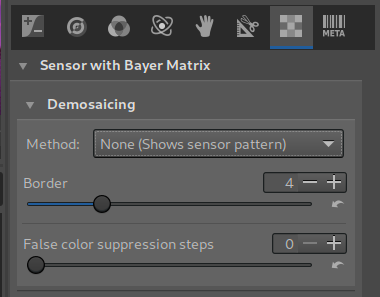
Next, we turn off debayering: On the right side, we click on the “Raw” tab (second last icon, showing a square pixel pattern) and under “Demosaicing” select as “Method” the very last entry in the pop-up list: “None (Shows sensor pattern)”.
Now the image is displayed in its raw sensor pattern. If we zoom all the way into the image with the “+” key, we can see it on the computer monitor:
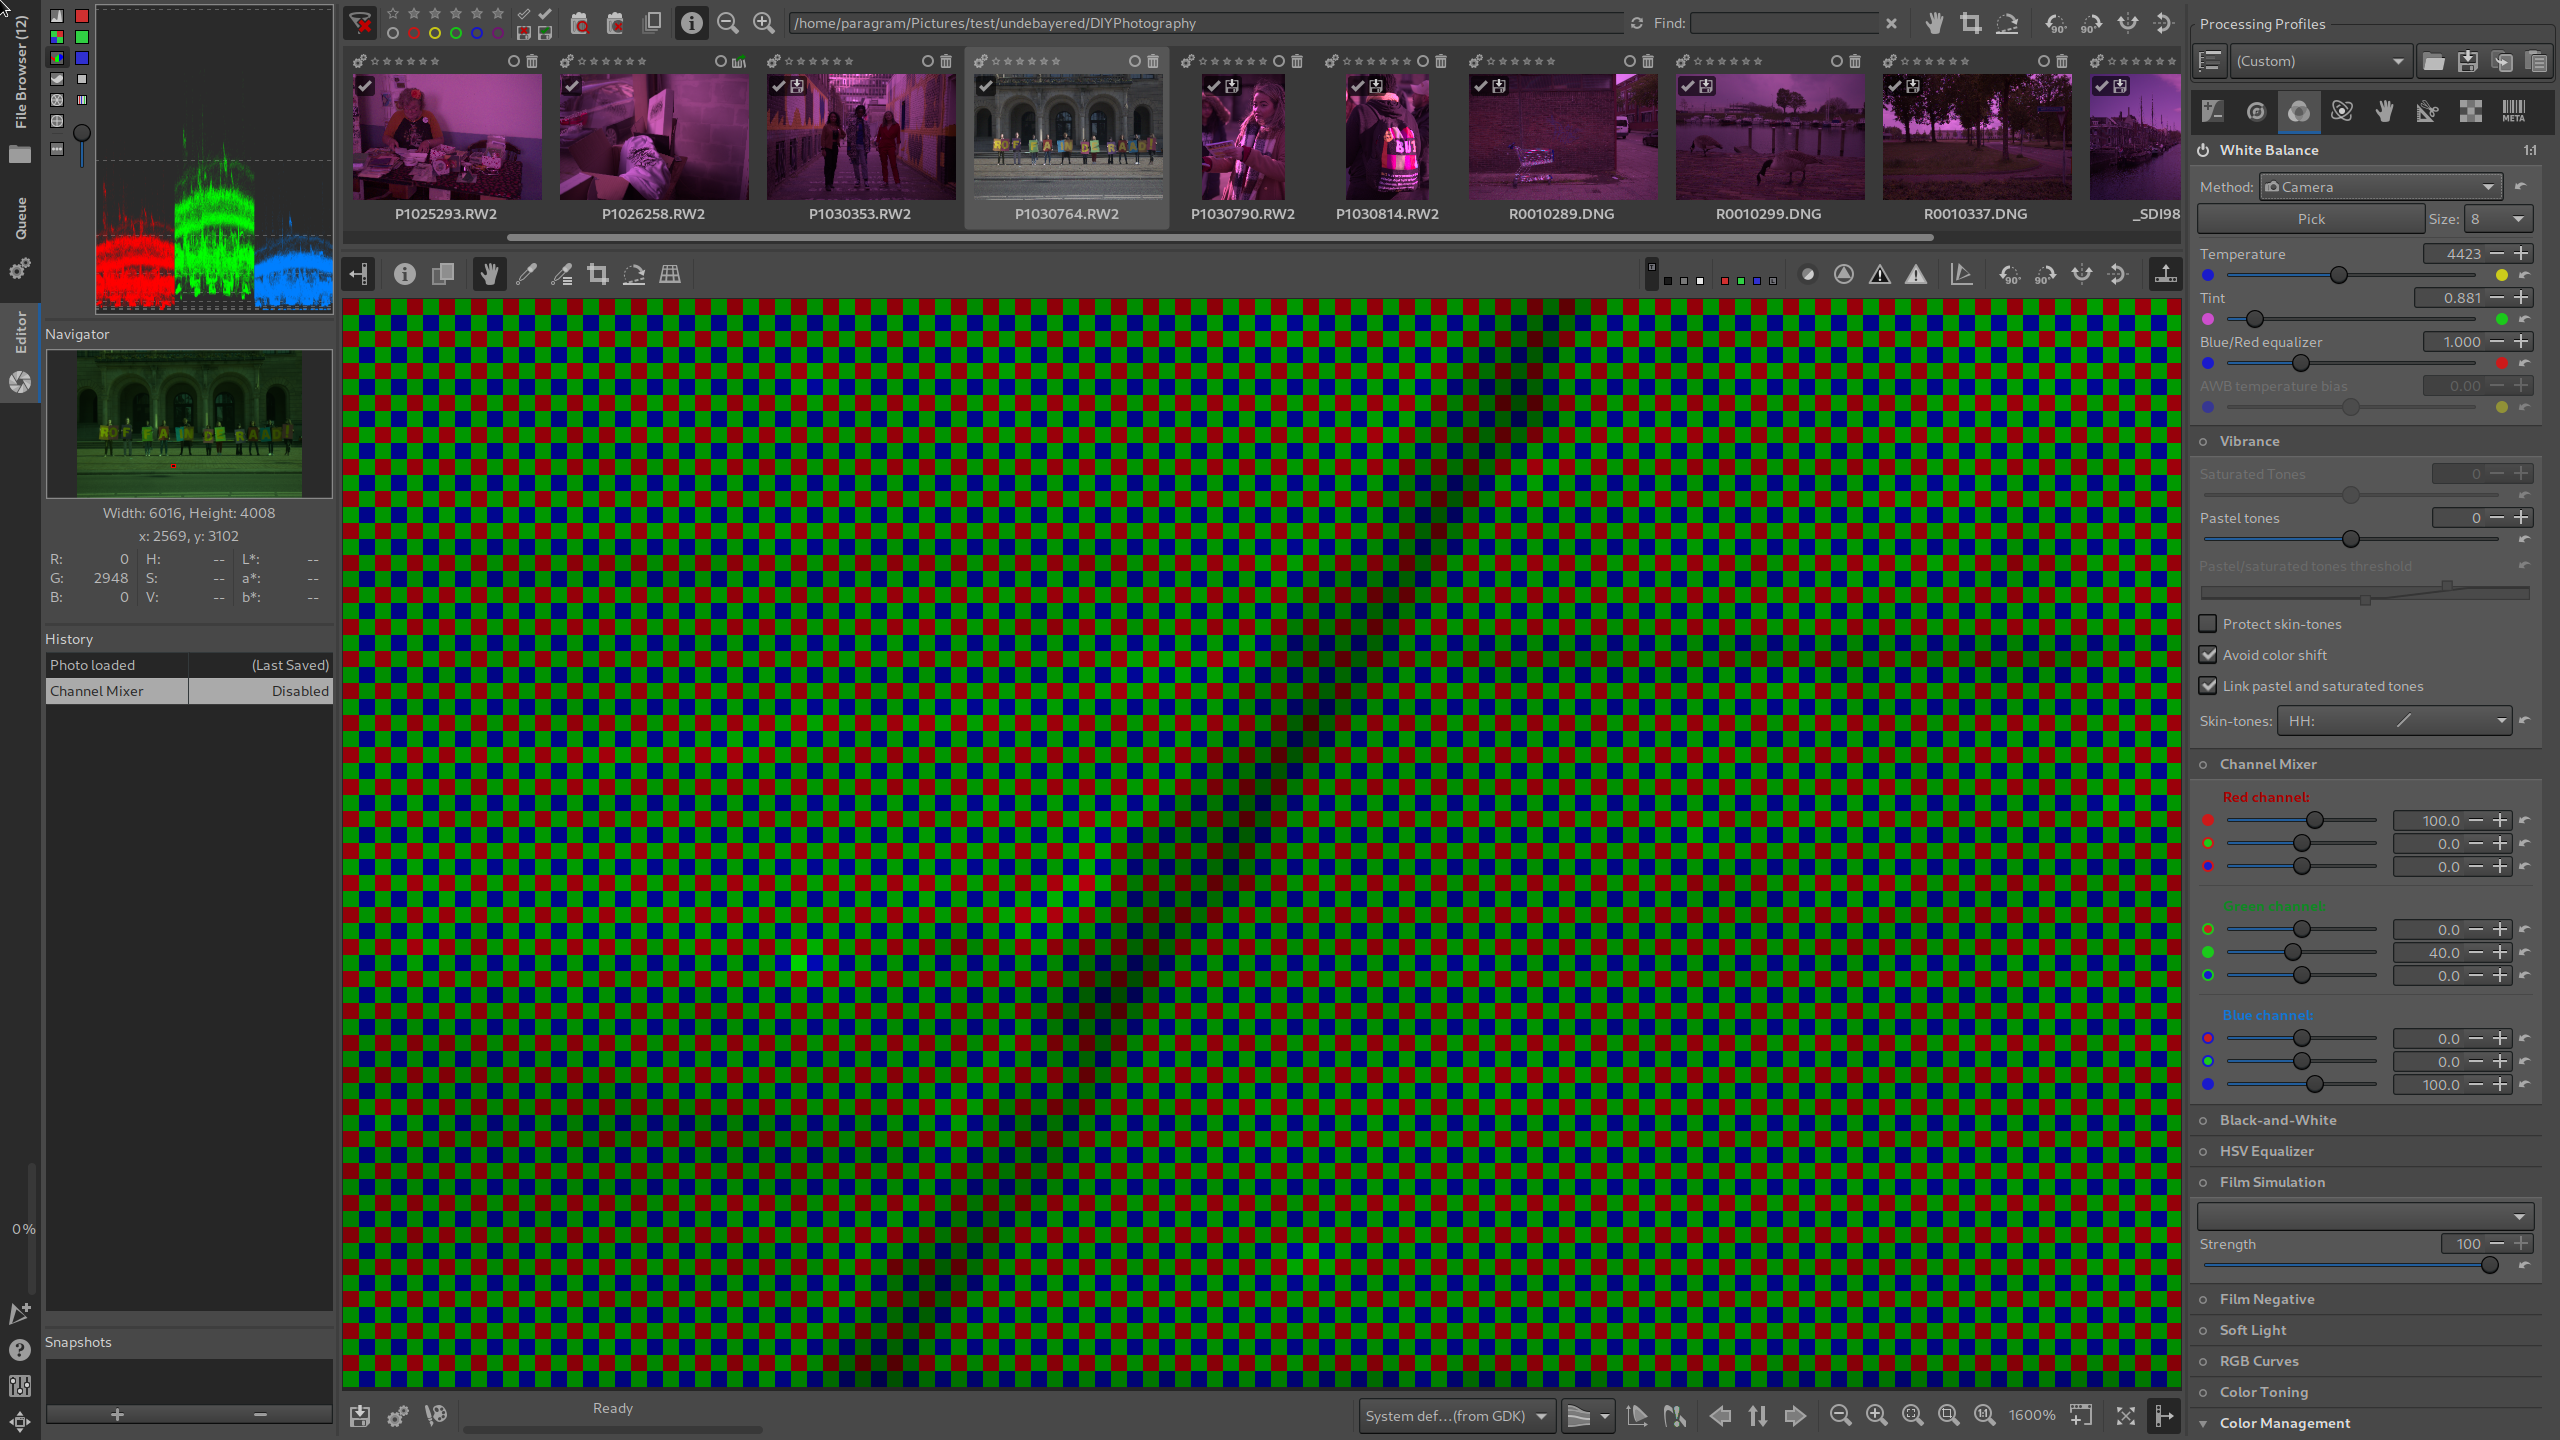
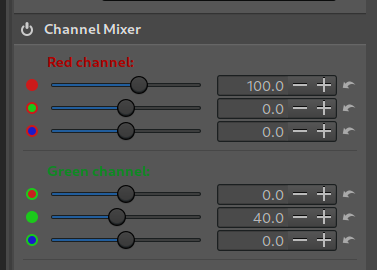
We switch to the Color tab (third icon in the right window, keyboard shortcut “Alt-c”) and turn on the “Channel Mixer”. In the “Green Channel” we decrease the value of the middle slider (the one with the green icon on the left) from 100.0 to 40.0. Our image is now ready to be exported.
By the way, you can save all these settings as a custom profile (e.g. “Undebayered RGB”) and use it instead of the “(Neutral)” profile in the future to save yourself manual work.
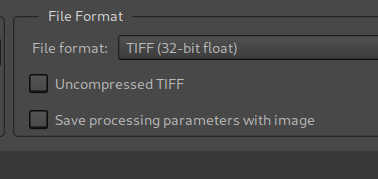
On the left pane, we go to the “Queue” tab and configure it as follows:
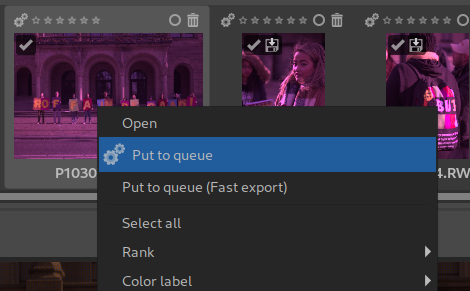
On the left pane we return to the editor (last icon, Ctrl-F4), right-click on the thumbnail of the image at the top and select “Put to queue”. Now the image will be exported as a TIFF file with maximum color depth.
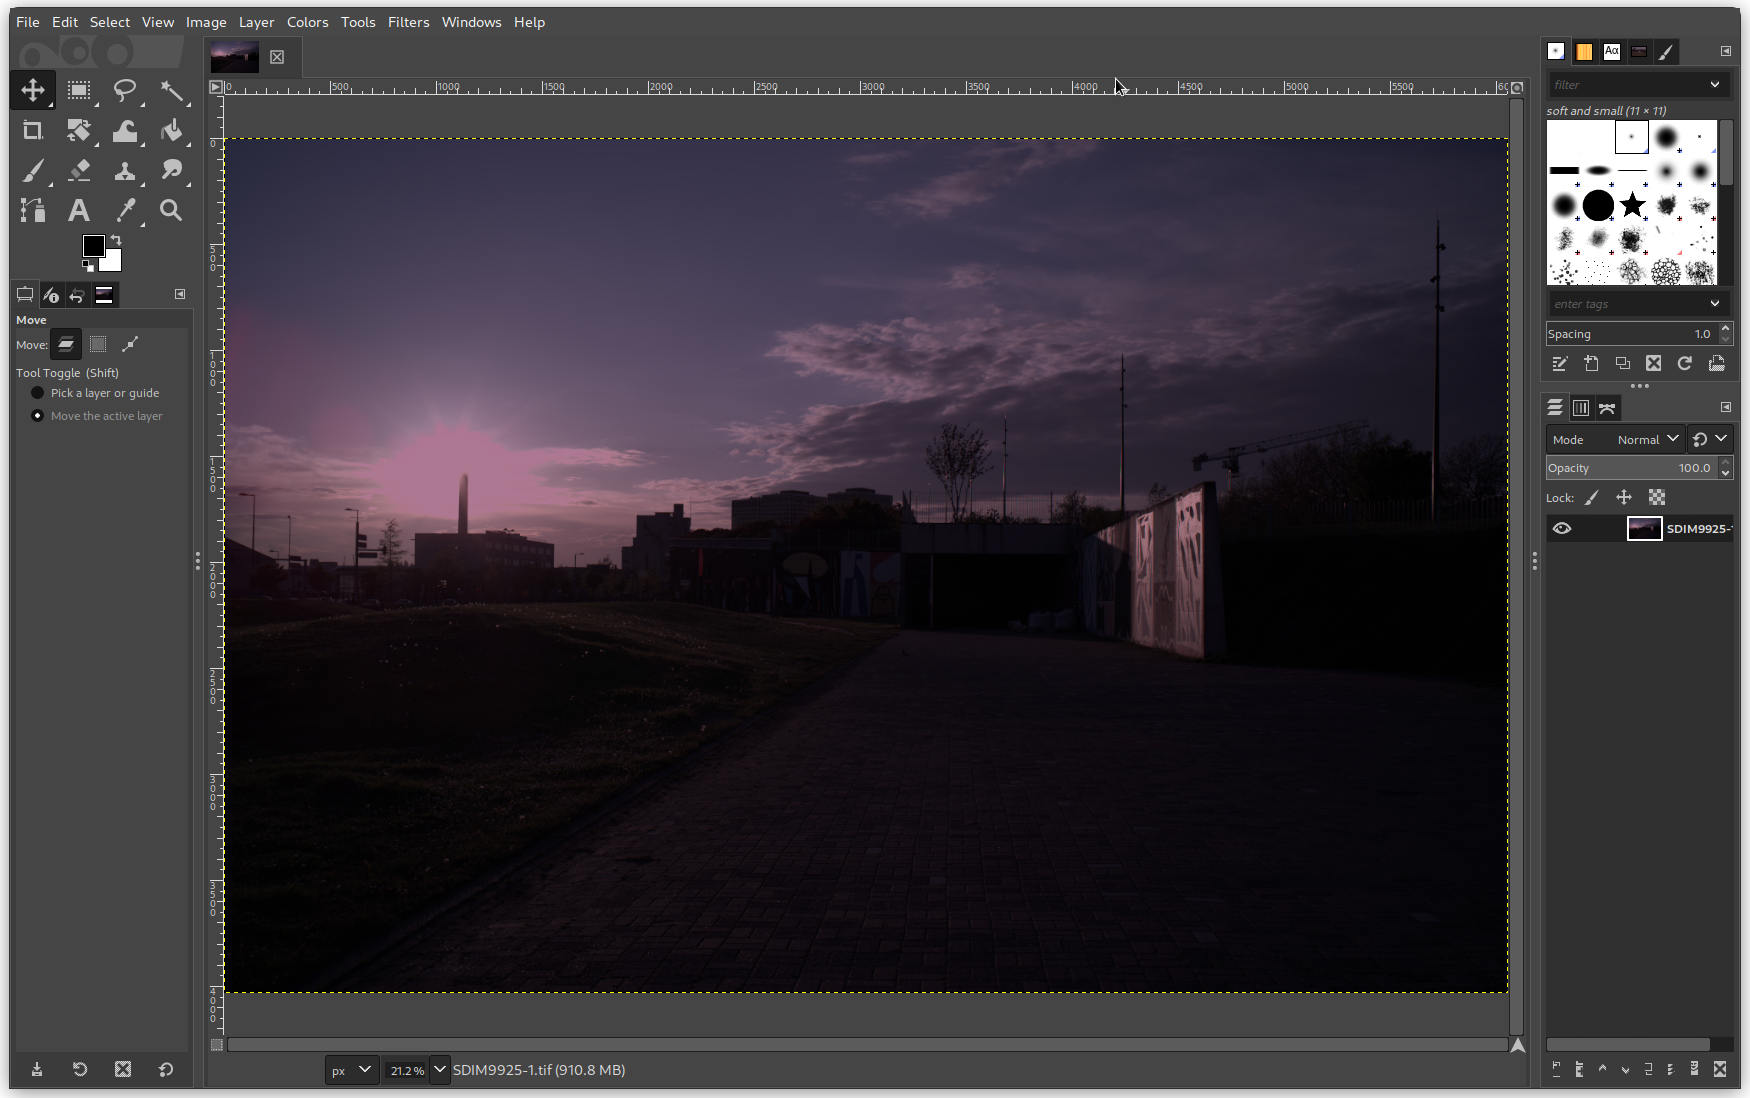
We launch Gimp and open the exported TIFF:
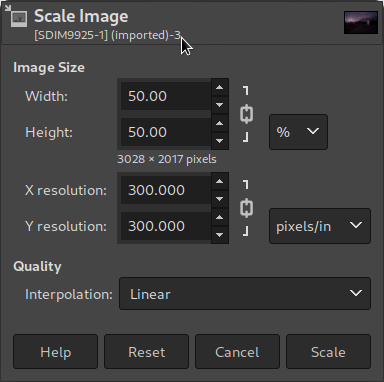
If we zoom all the way in, we see the red-green-green-blue sensor pattern again. Now we go to the menu item “-> Image -> Scale Image”, set the scale factor to 50% and the interpolation to “Linear” and click on the “Scale” button:
Now we have obtained a “Foveon-like” full color image. We choose “-> File -> Export as” to save it again as a TIFF, either overwriting the original file or saving it under a new name.
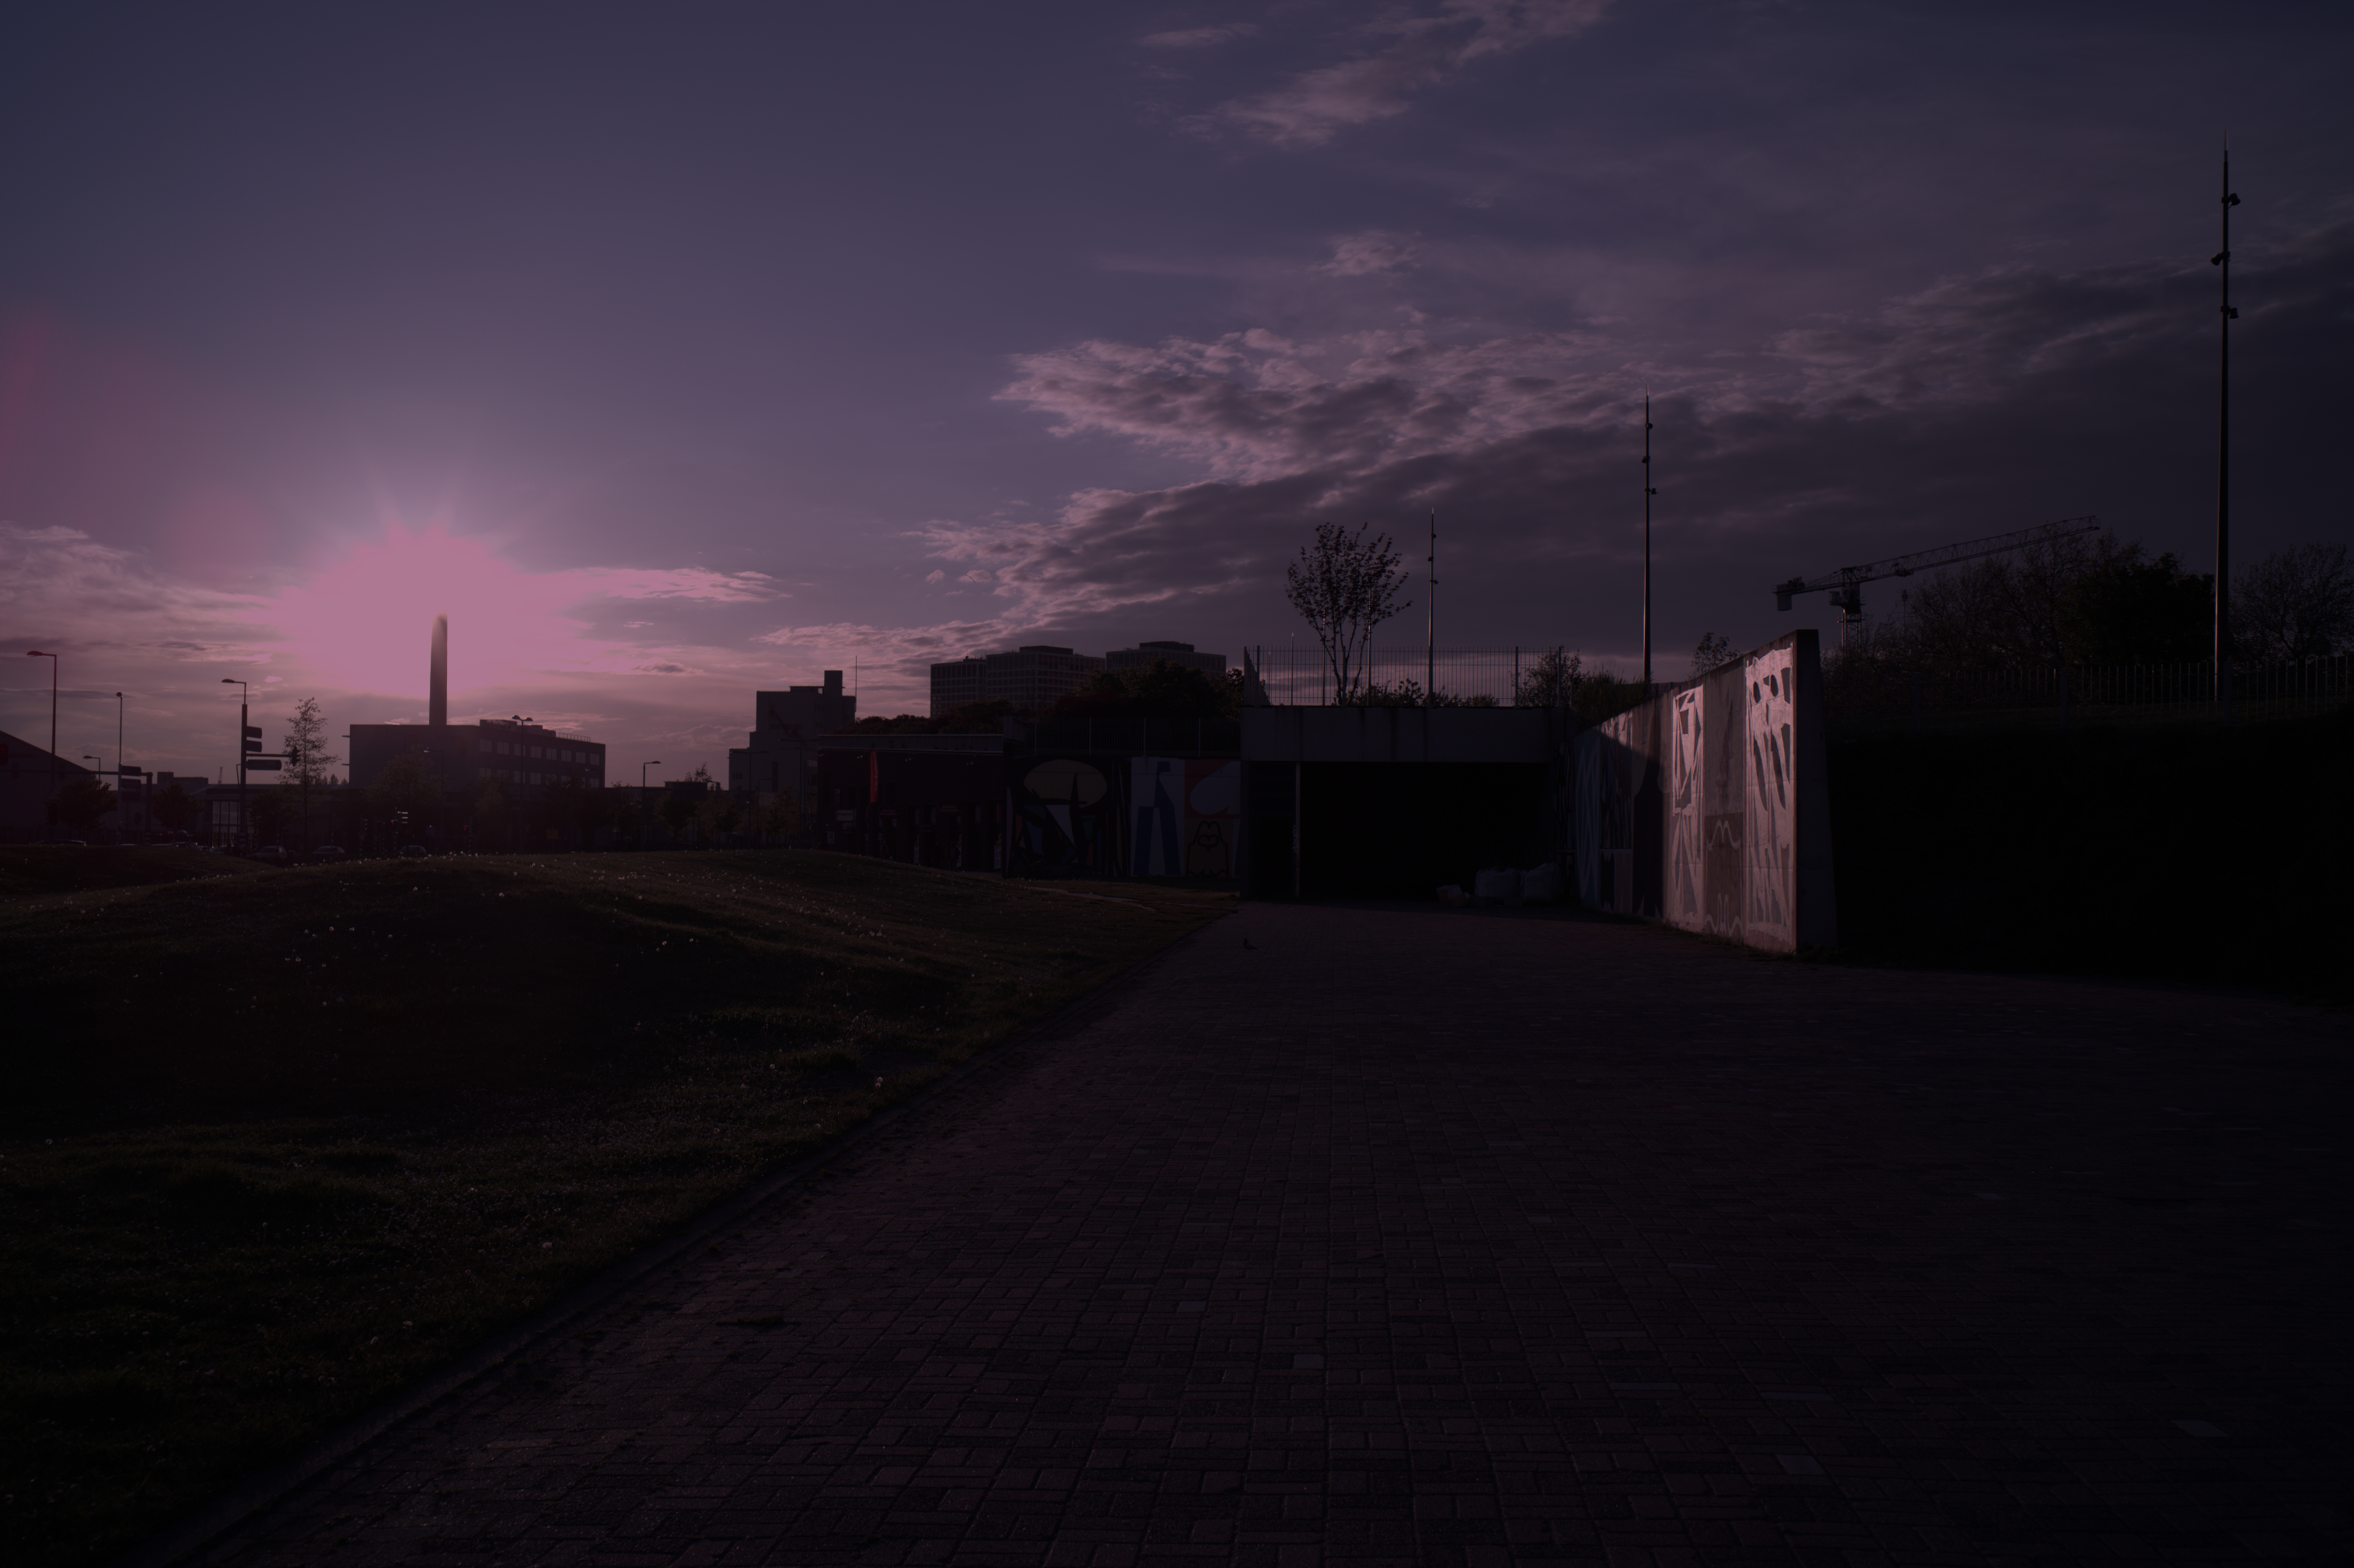
The image now looks underexposed (because we lowered the green channel) and probably has a color tint:
If you are familiar with The Gimp, you can make all the remaining image corrections (white balance, exposure, and contrast adjustment) in that program. Otherwise, it is more convenient to do these in your favorite image editing program.
When we return to RawTherapee and edit the TIFF image exported by Gimp there, it will appear as an HDR image in the thumbnail navigation panel:
Darktable can also output undebayered images and even downscale them during export, so that the roundtrip via Gimp is no longer necessary.
Making the right image settings may be a bit more difficult at first:
In the “lighttable” tab, import an image by clicking the “add to library” button in the upper left corner.
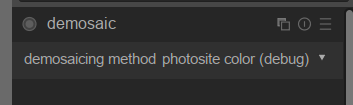
On the right pane, search the “demosaic” module and set the demosaic method to “photosite color (debug)”:
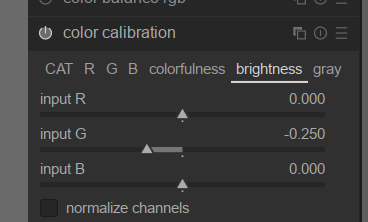
In the right pane, click the second button that looks like a power button and turn off all other active modules (especially “base curve”) except “white balance”.
Go back to the “lighttable” tab and click on the “export” settings on the right. Under “format options” set the file format to “TIFF (8/16/32-bit)” and the bit depth to “32-bit (float)”, and under “global options” set the size to “by scale (for file)” and enter the value 0.5. Set “high quality resampling” to “yes”. Then scroll down and click the “export” button.
If you want to make the final image corrections in Darktable, reimport the exported TIFF file.
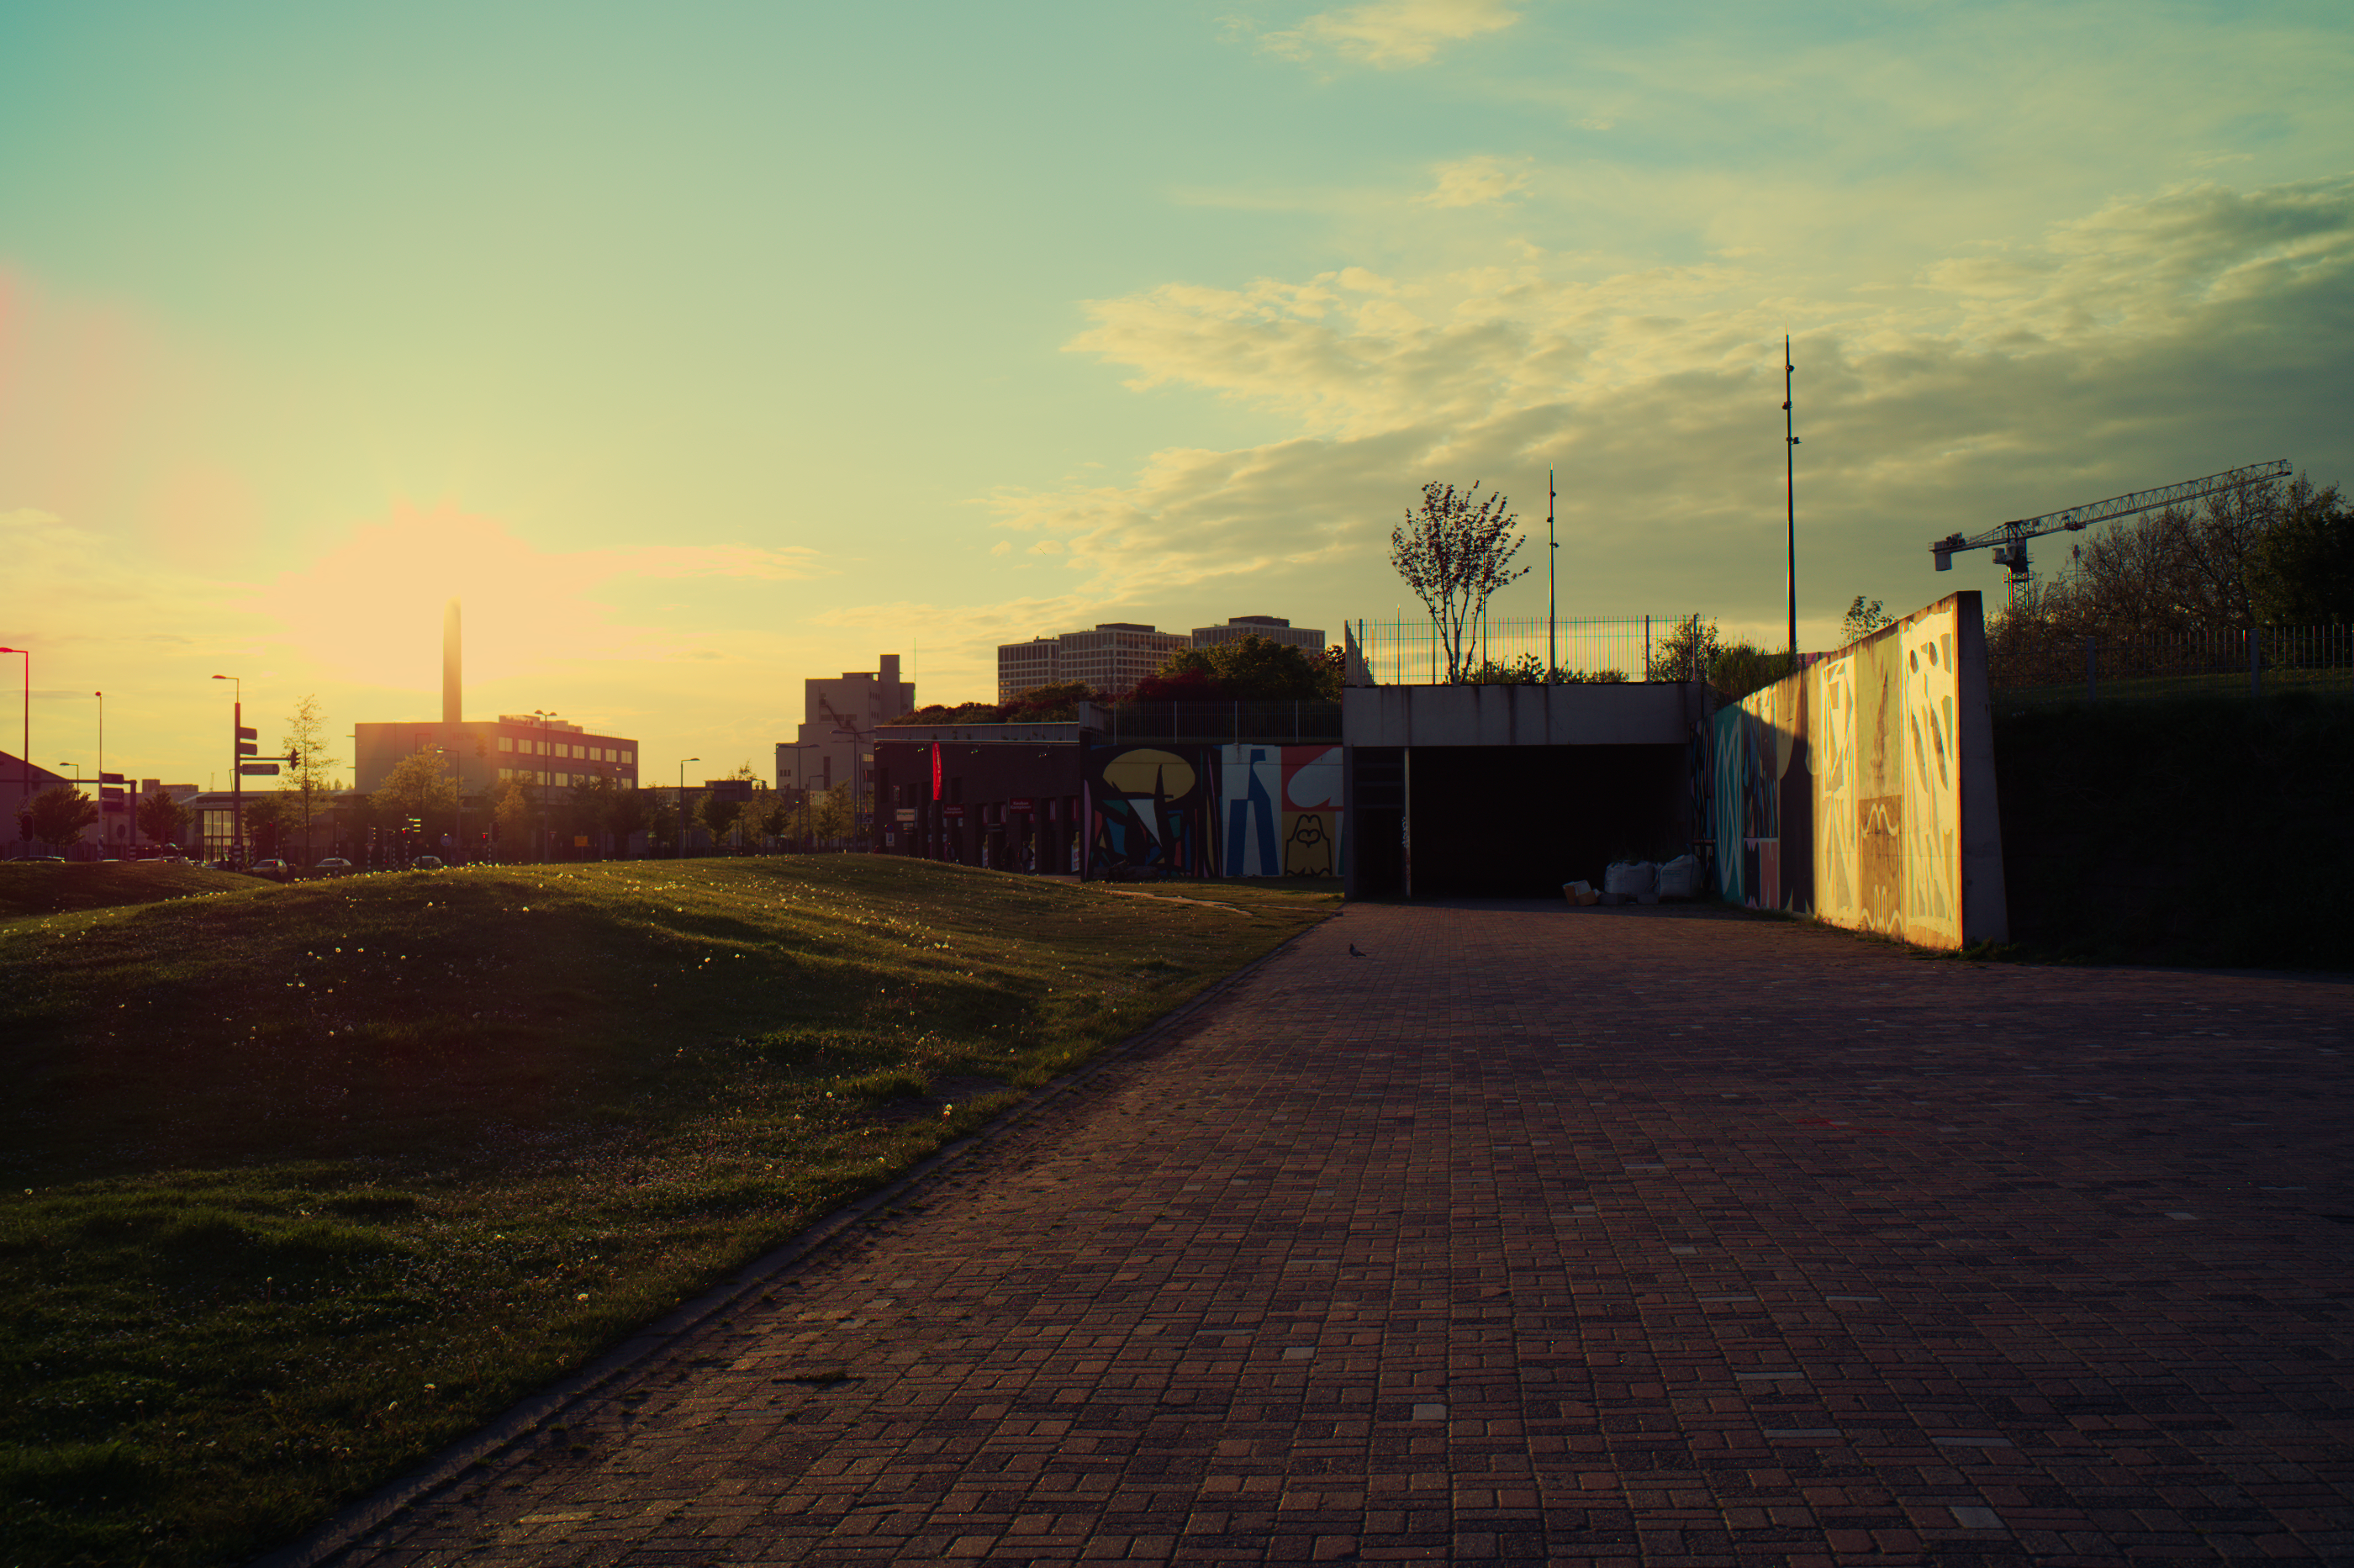
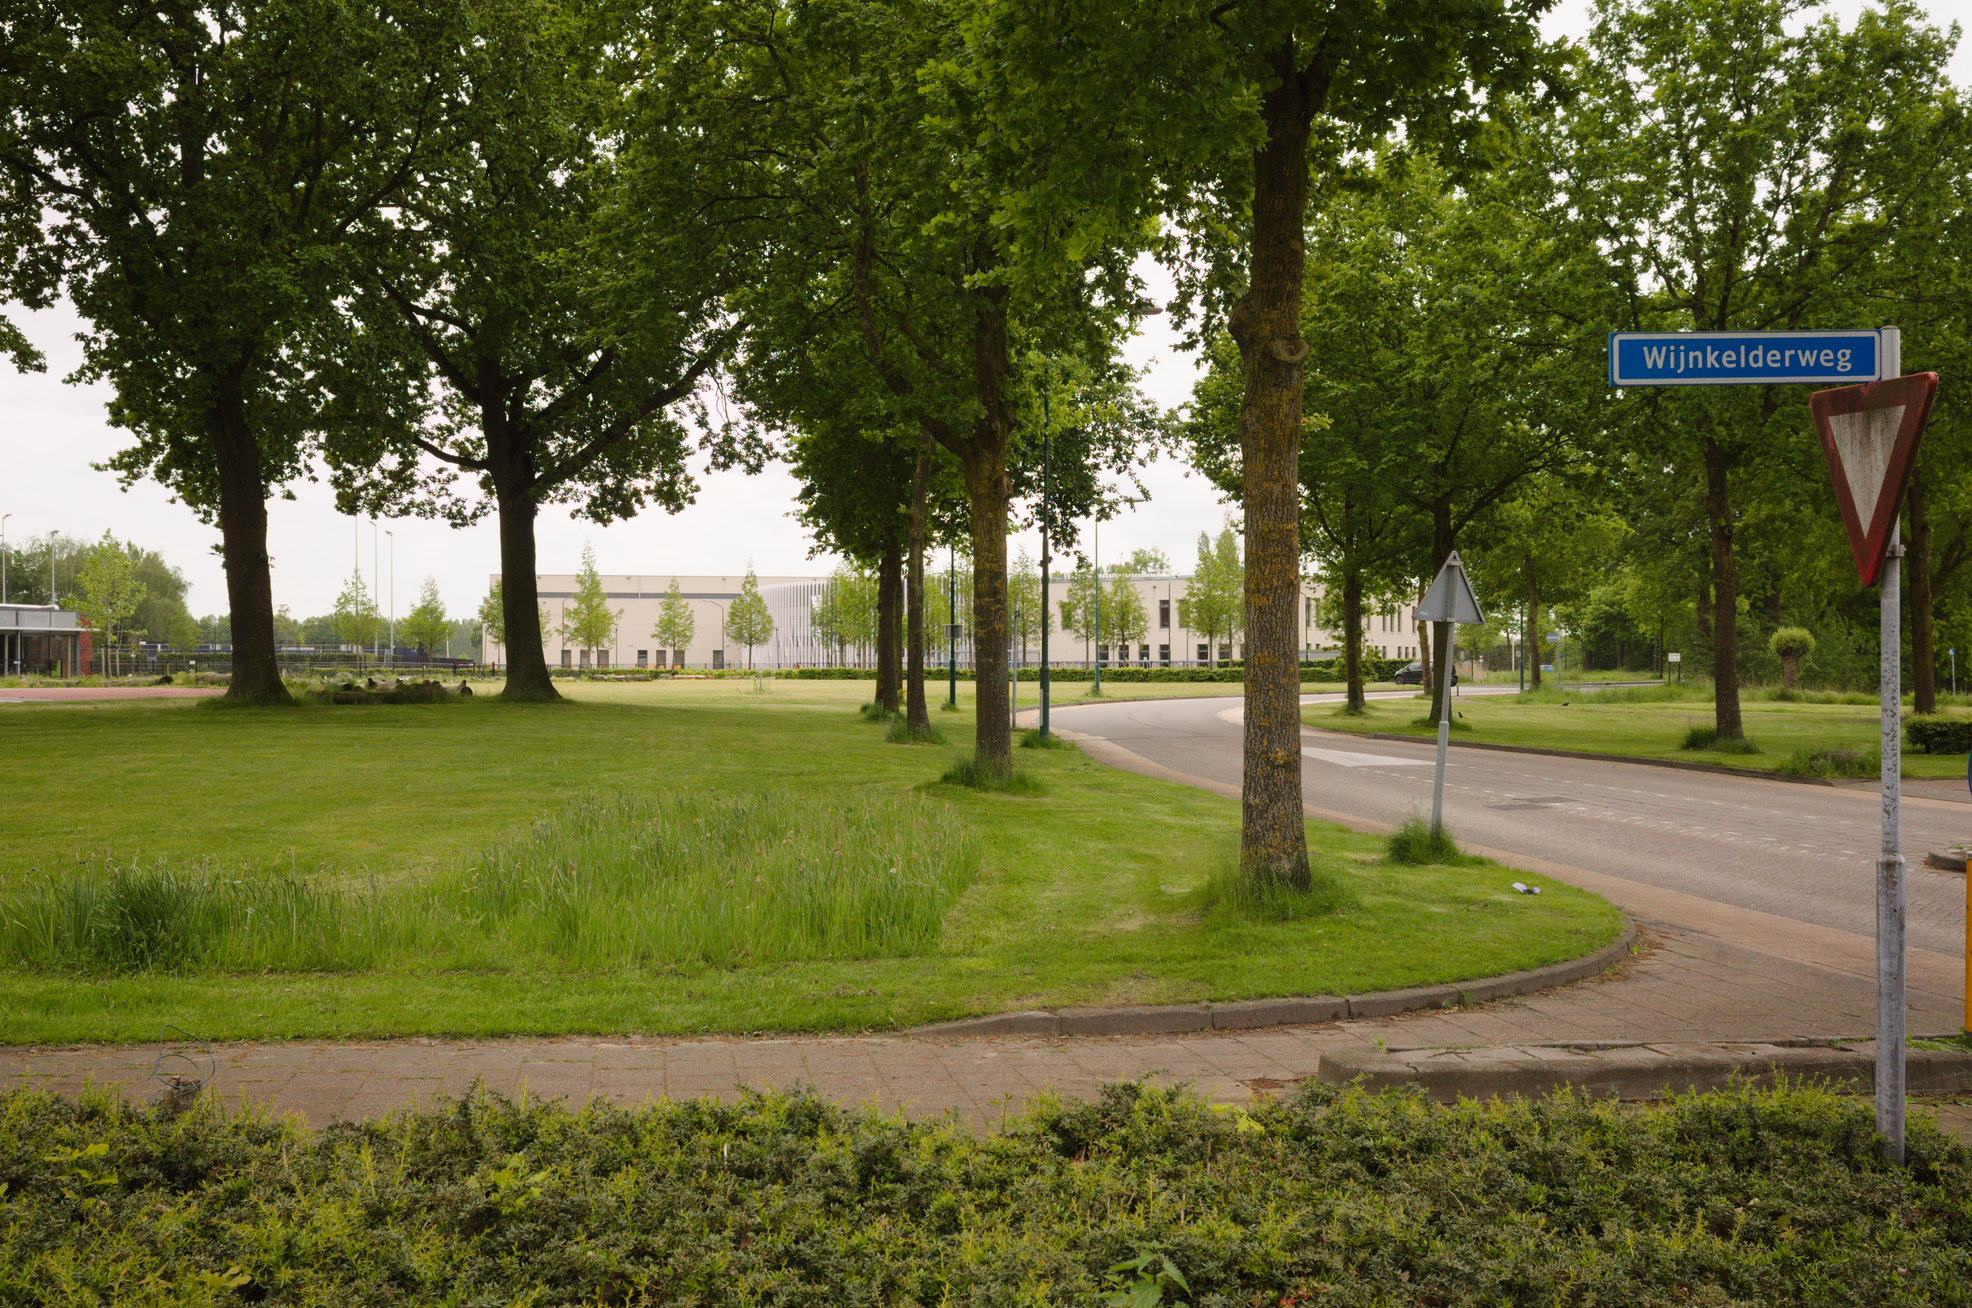
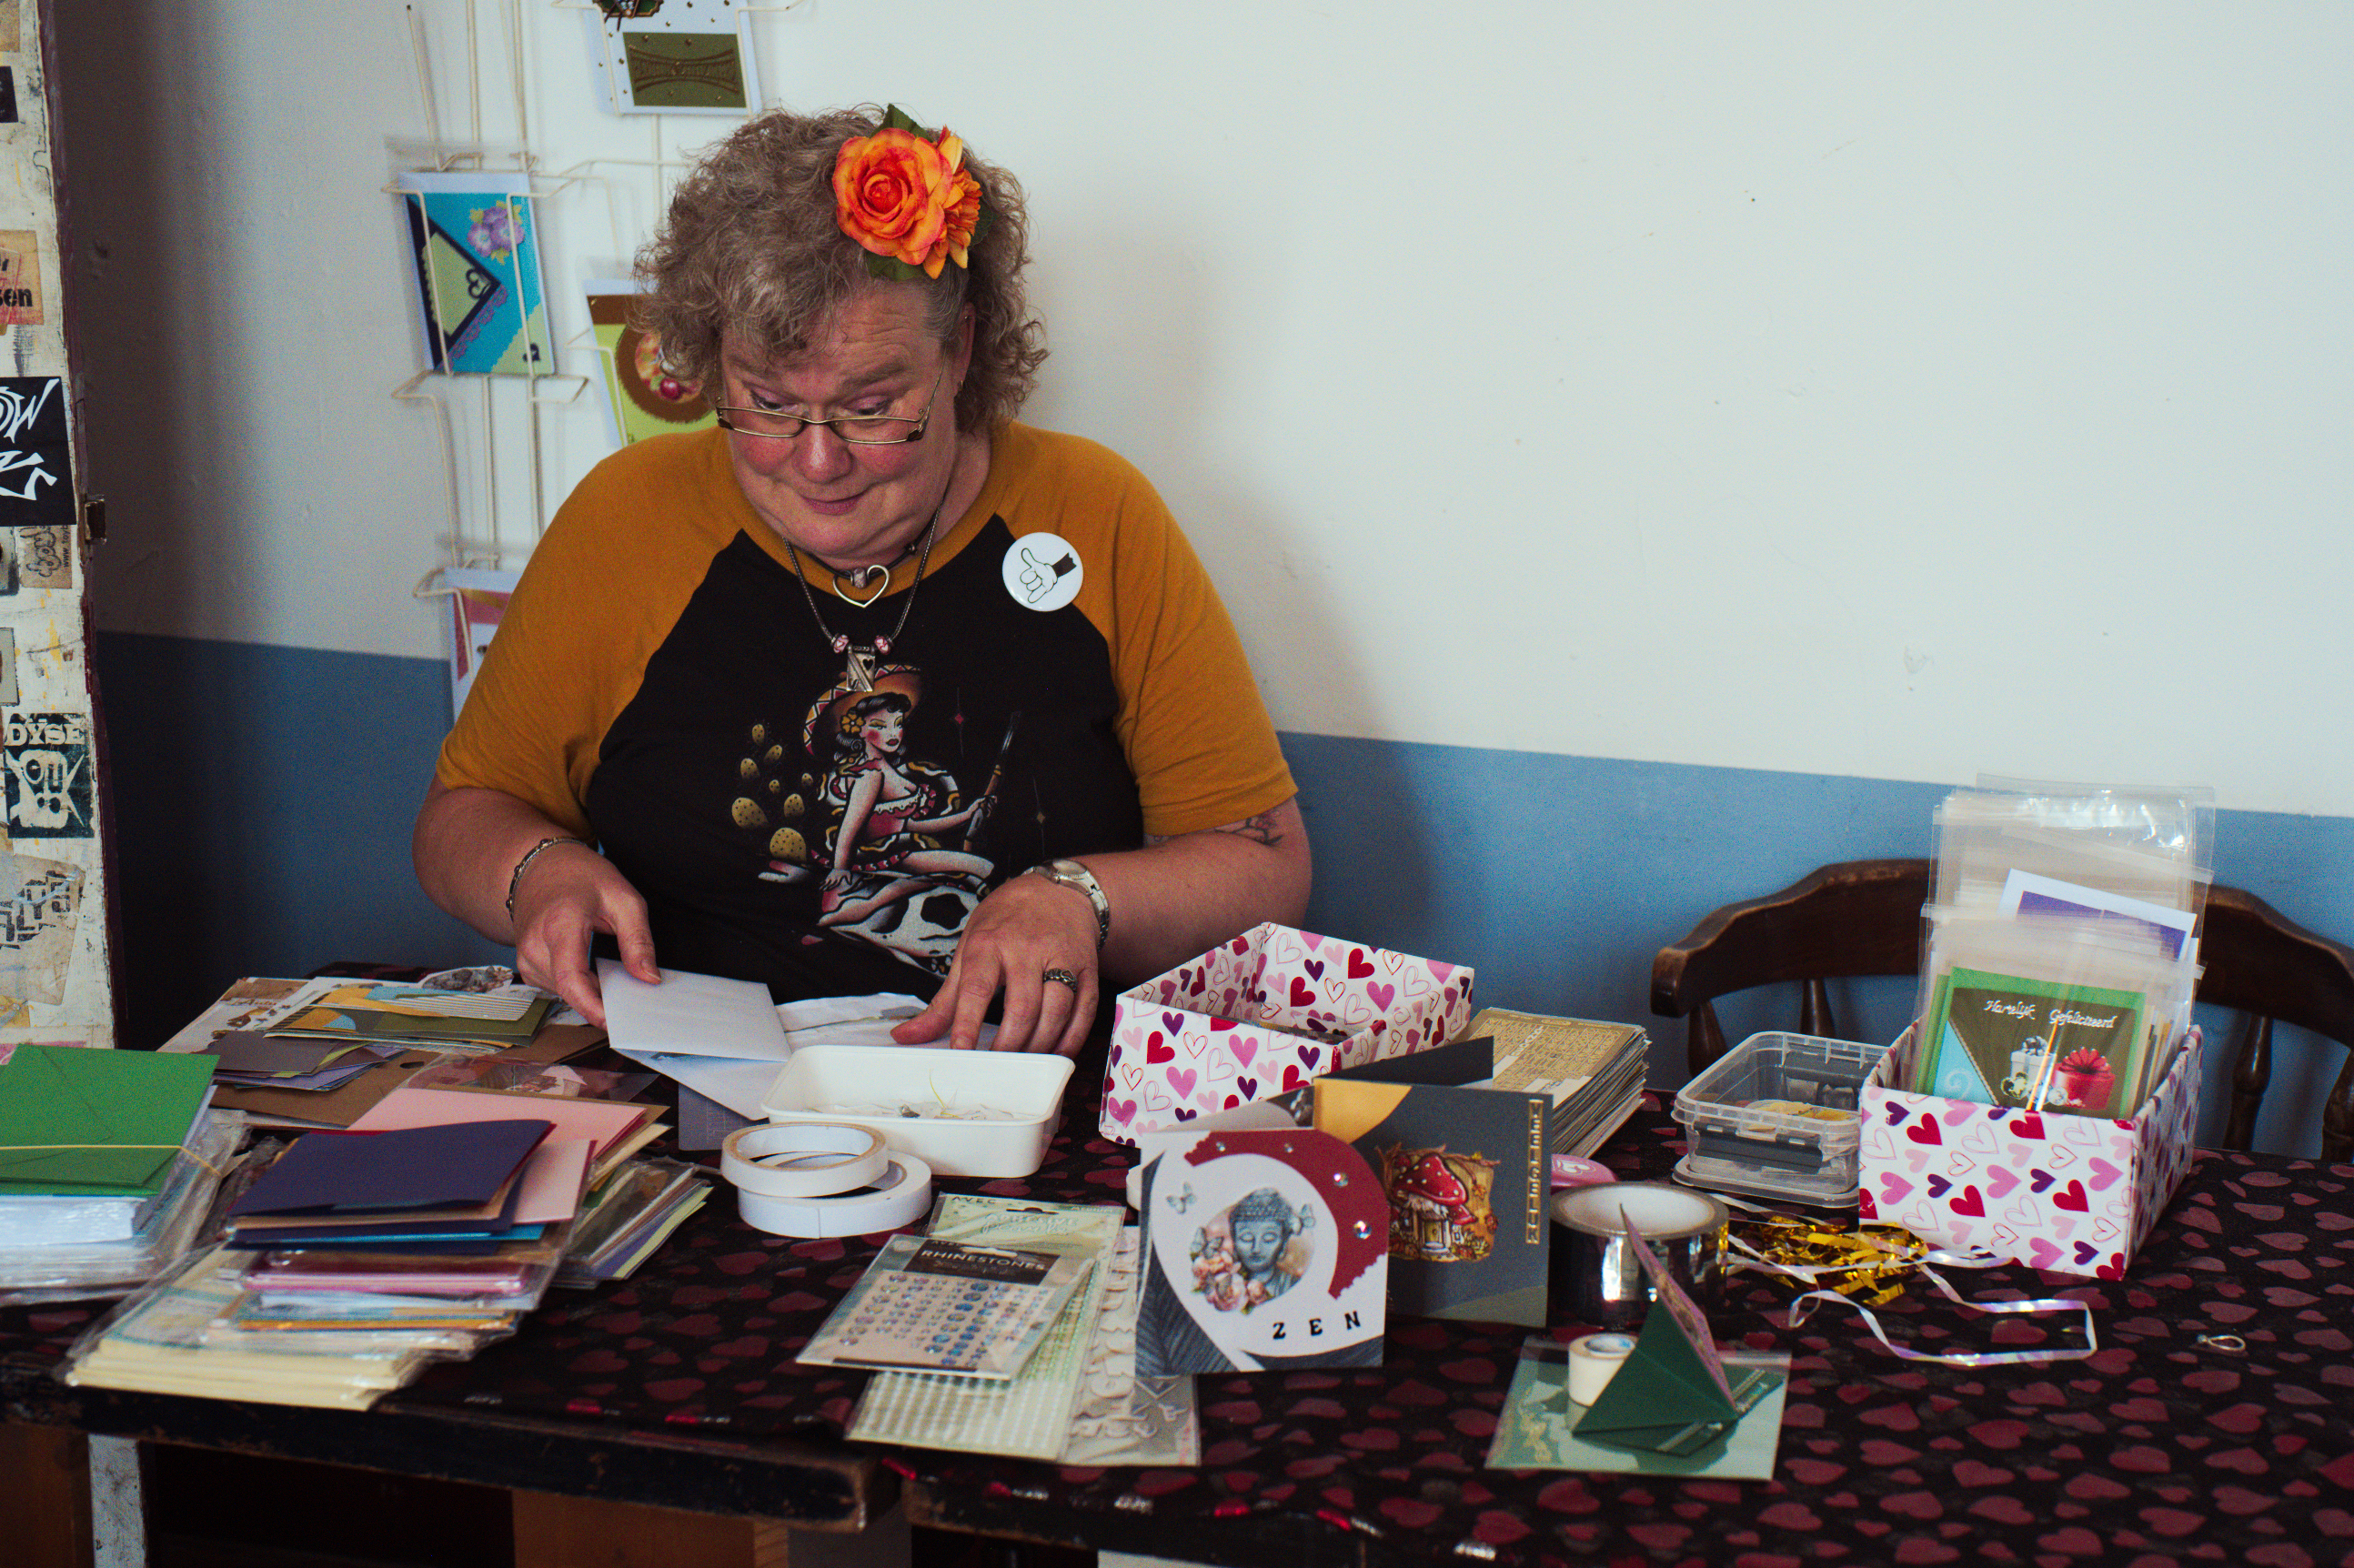
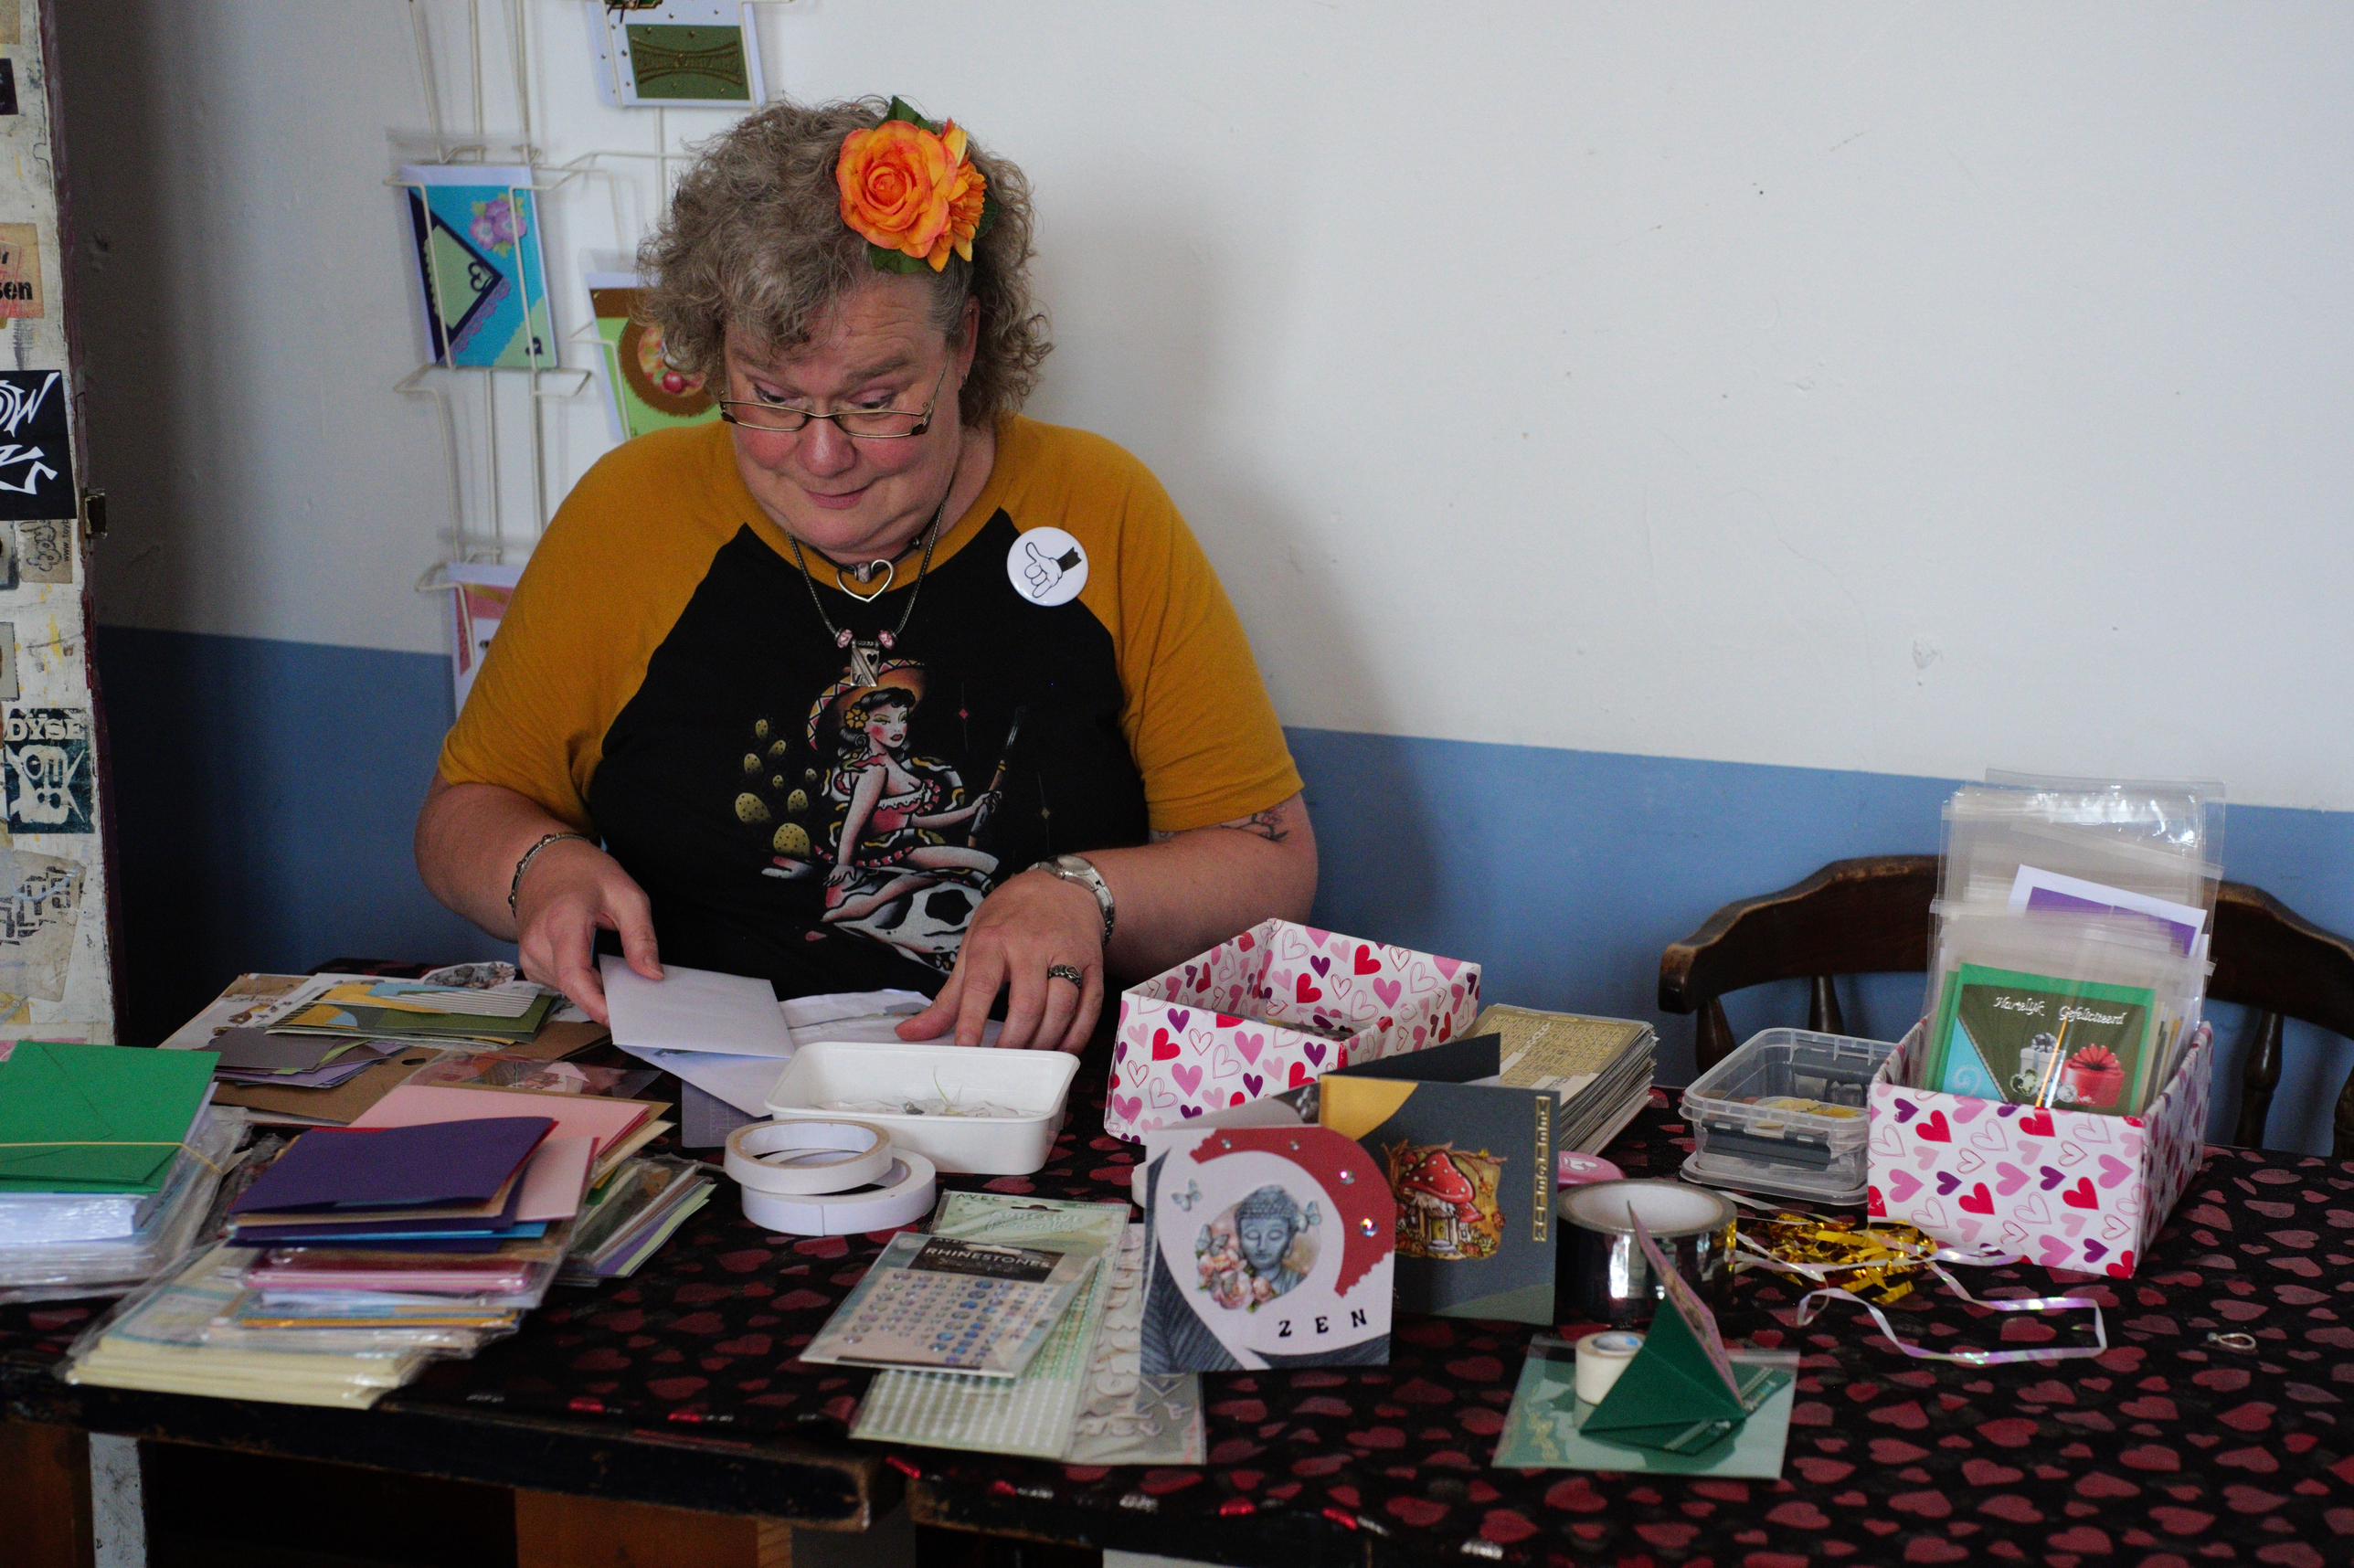
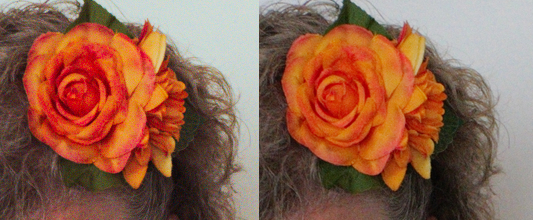
After exposure and white balance correction, we get images like the following:
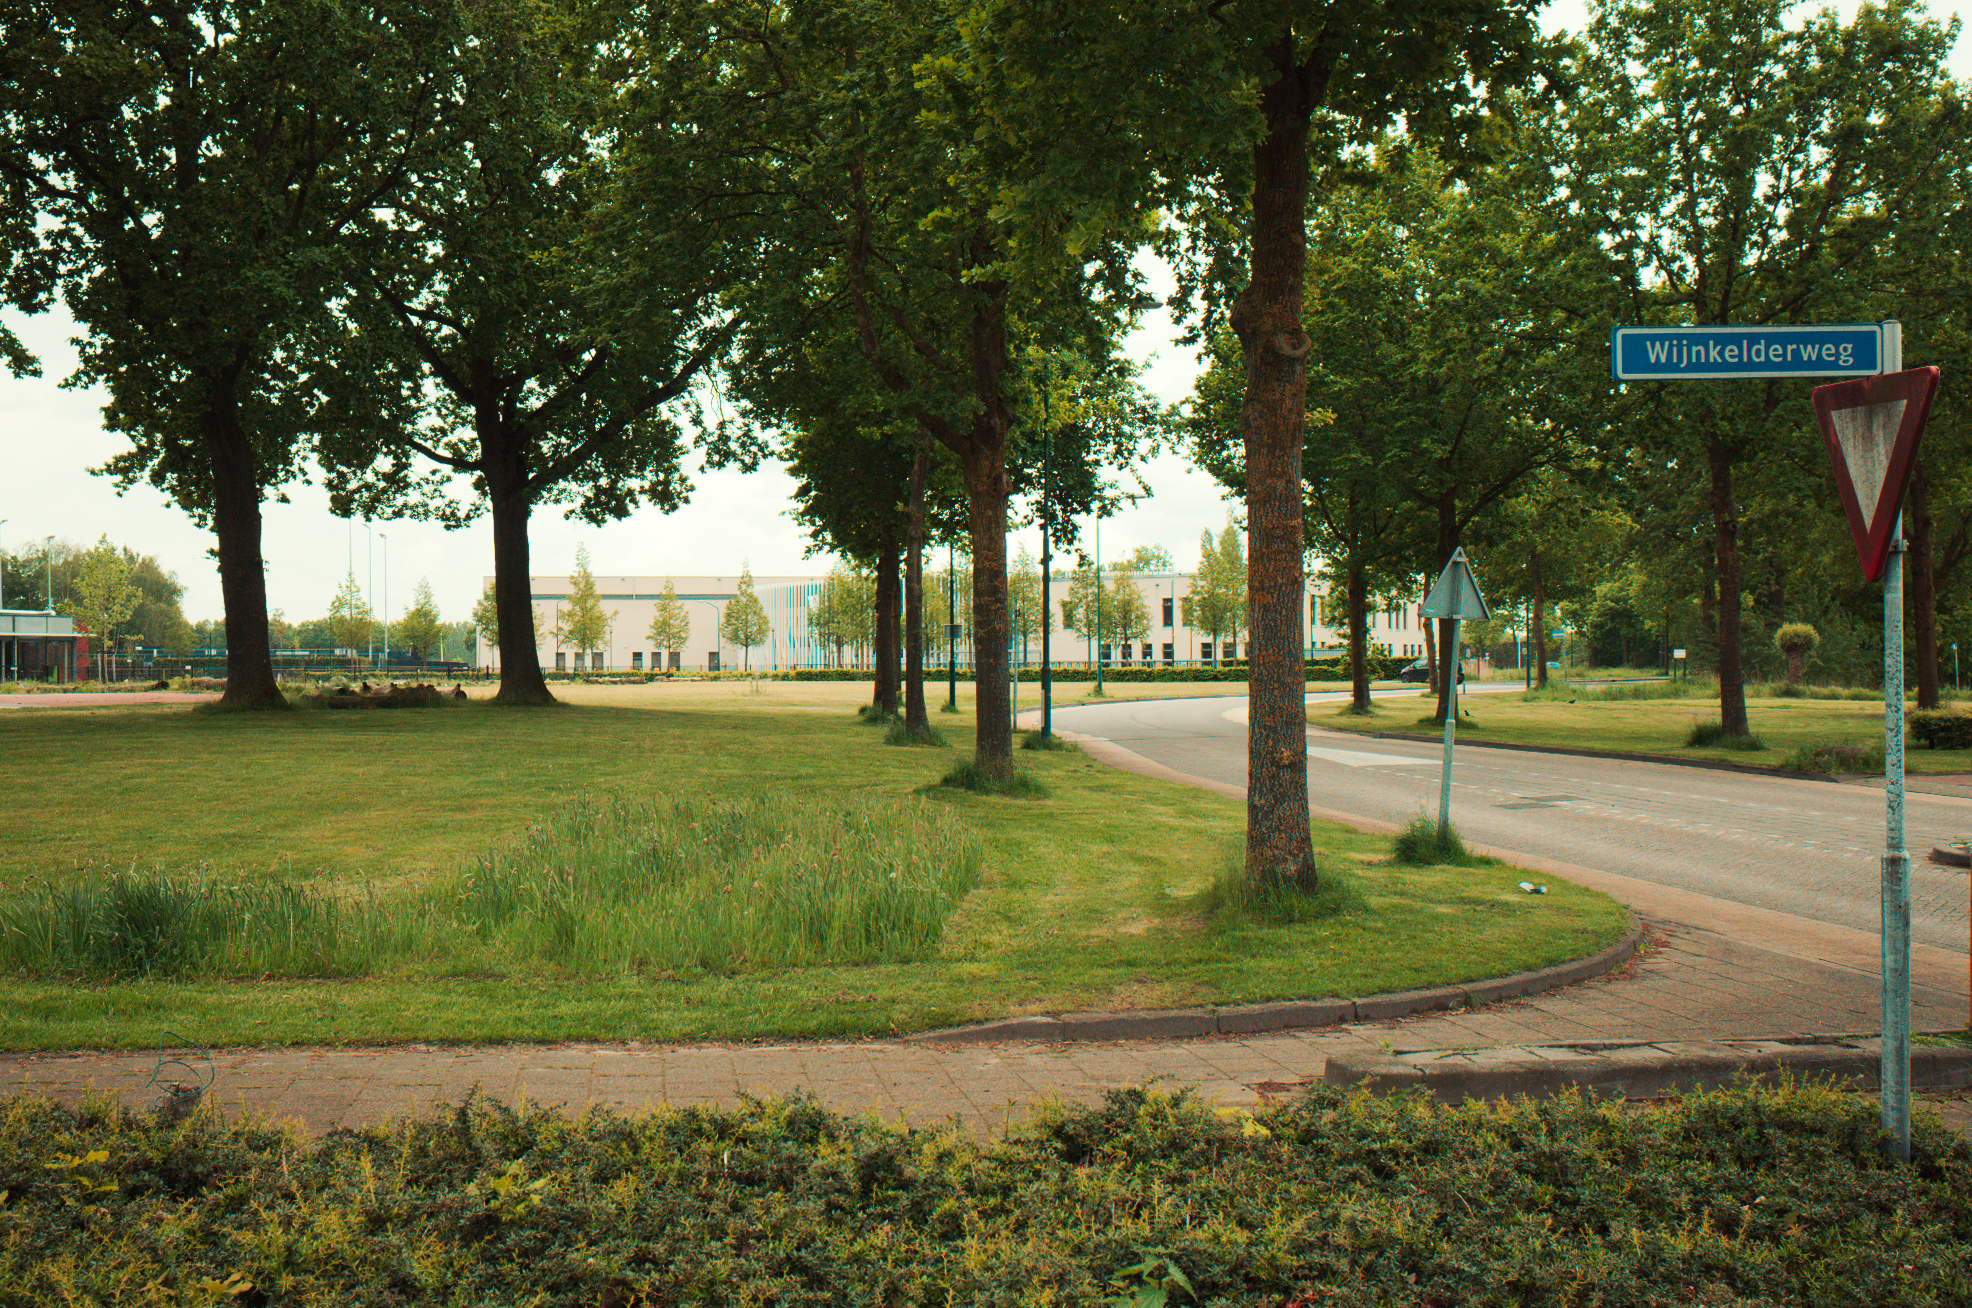
For comparison, here you can see the conventionally debayered 24 MP image scaled down to 50%:
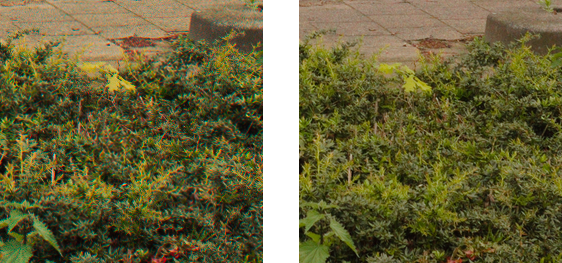
1:1 detail comparison:
All images were processed with only simple exposure and white balance correction, but in such a way that the “Foveon”-like and the conventionally debayered images look as similar to each other as possible:
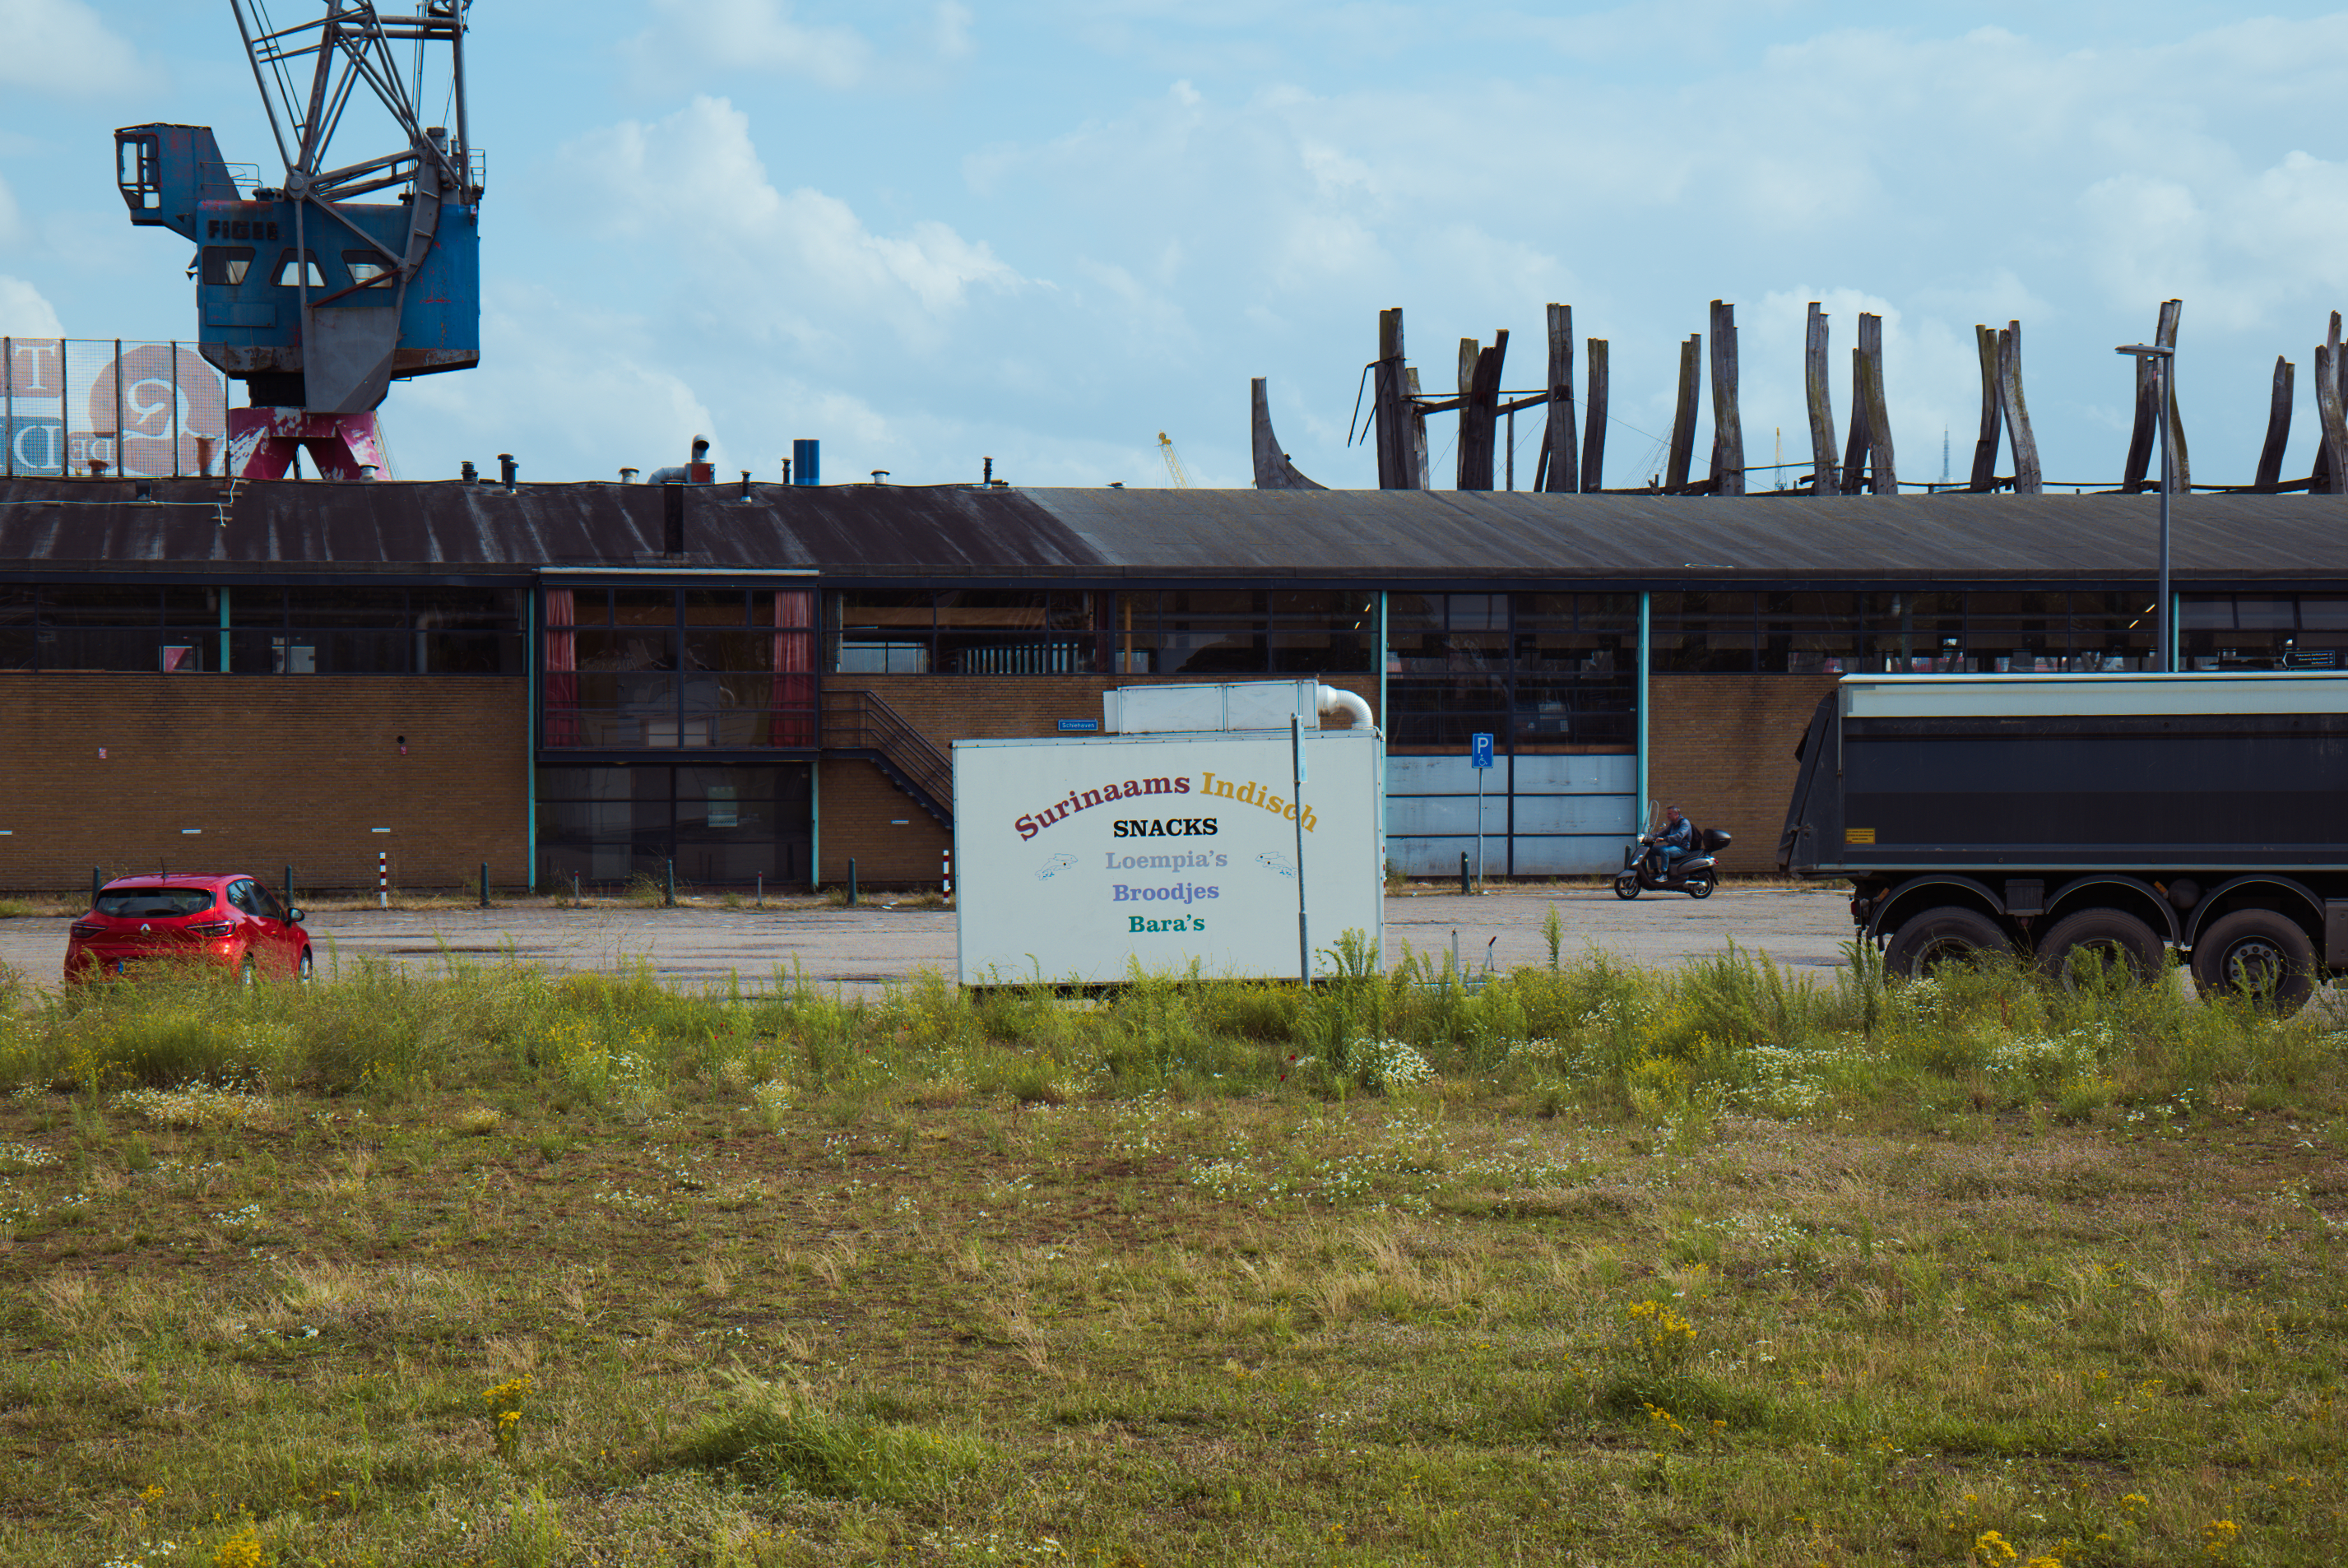
1:1 detail:


1:1 detail comparison:
It can be difficult to compare results because in the “Foveon-like” process we completely bypass the camera manufacturer’s color science (and color calibration). In most cases, we simply get other kinds of colors. It’s similar to shooting two completely different film stocks with an analog still camera, such as negative film (traditional debayering) and slide film (our DIY Foveon-like RGB downsampling process).
Comparing the same camera images that were (a) conventionally debayered and downscaled by 50% and (b) RGB downscaled in our DIY “Foveon-like” process, the following differences become clear:
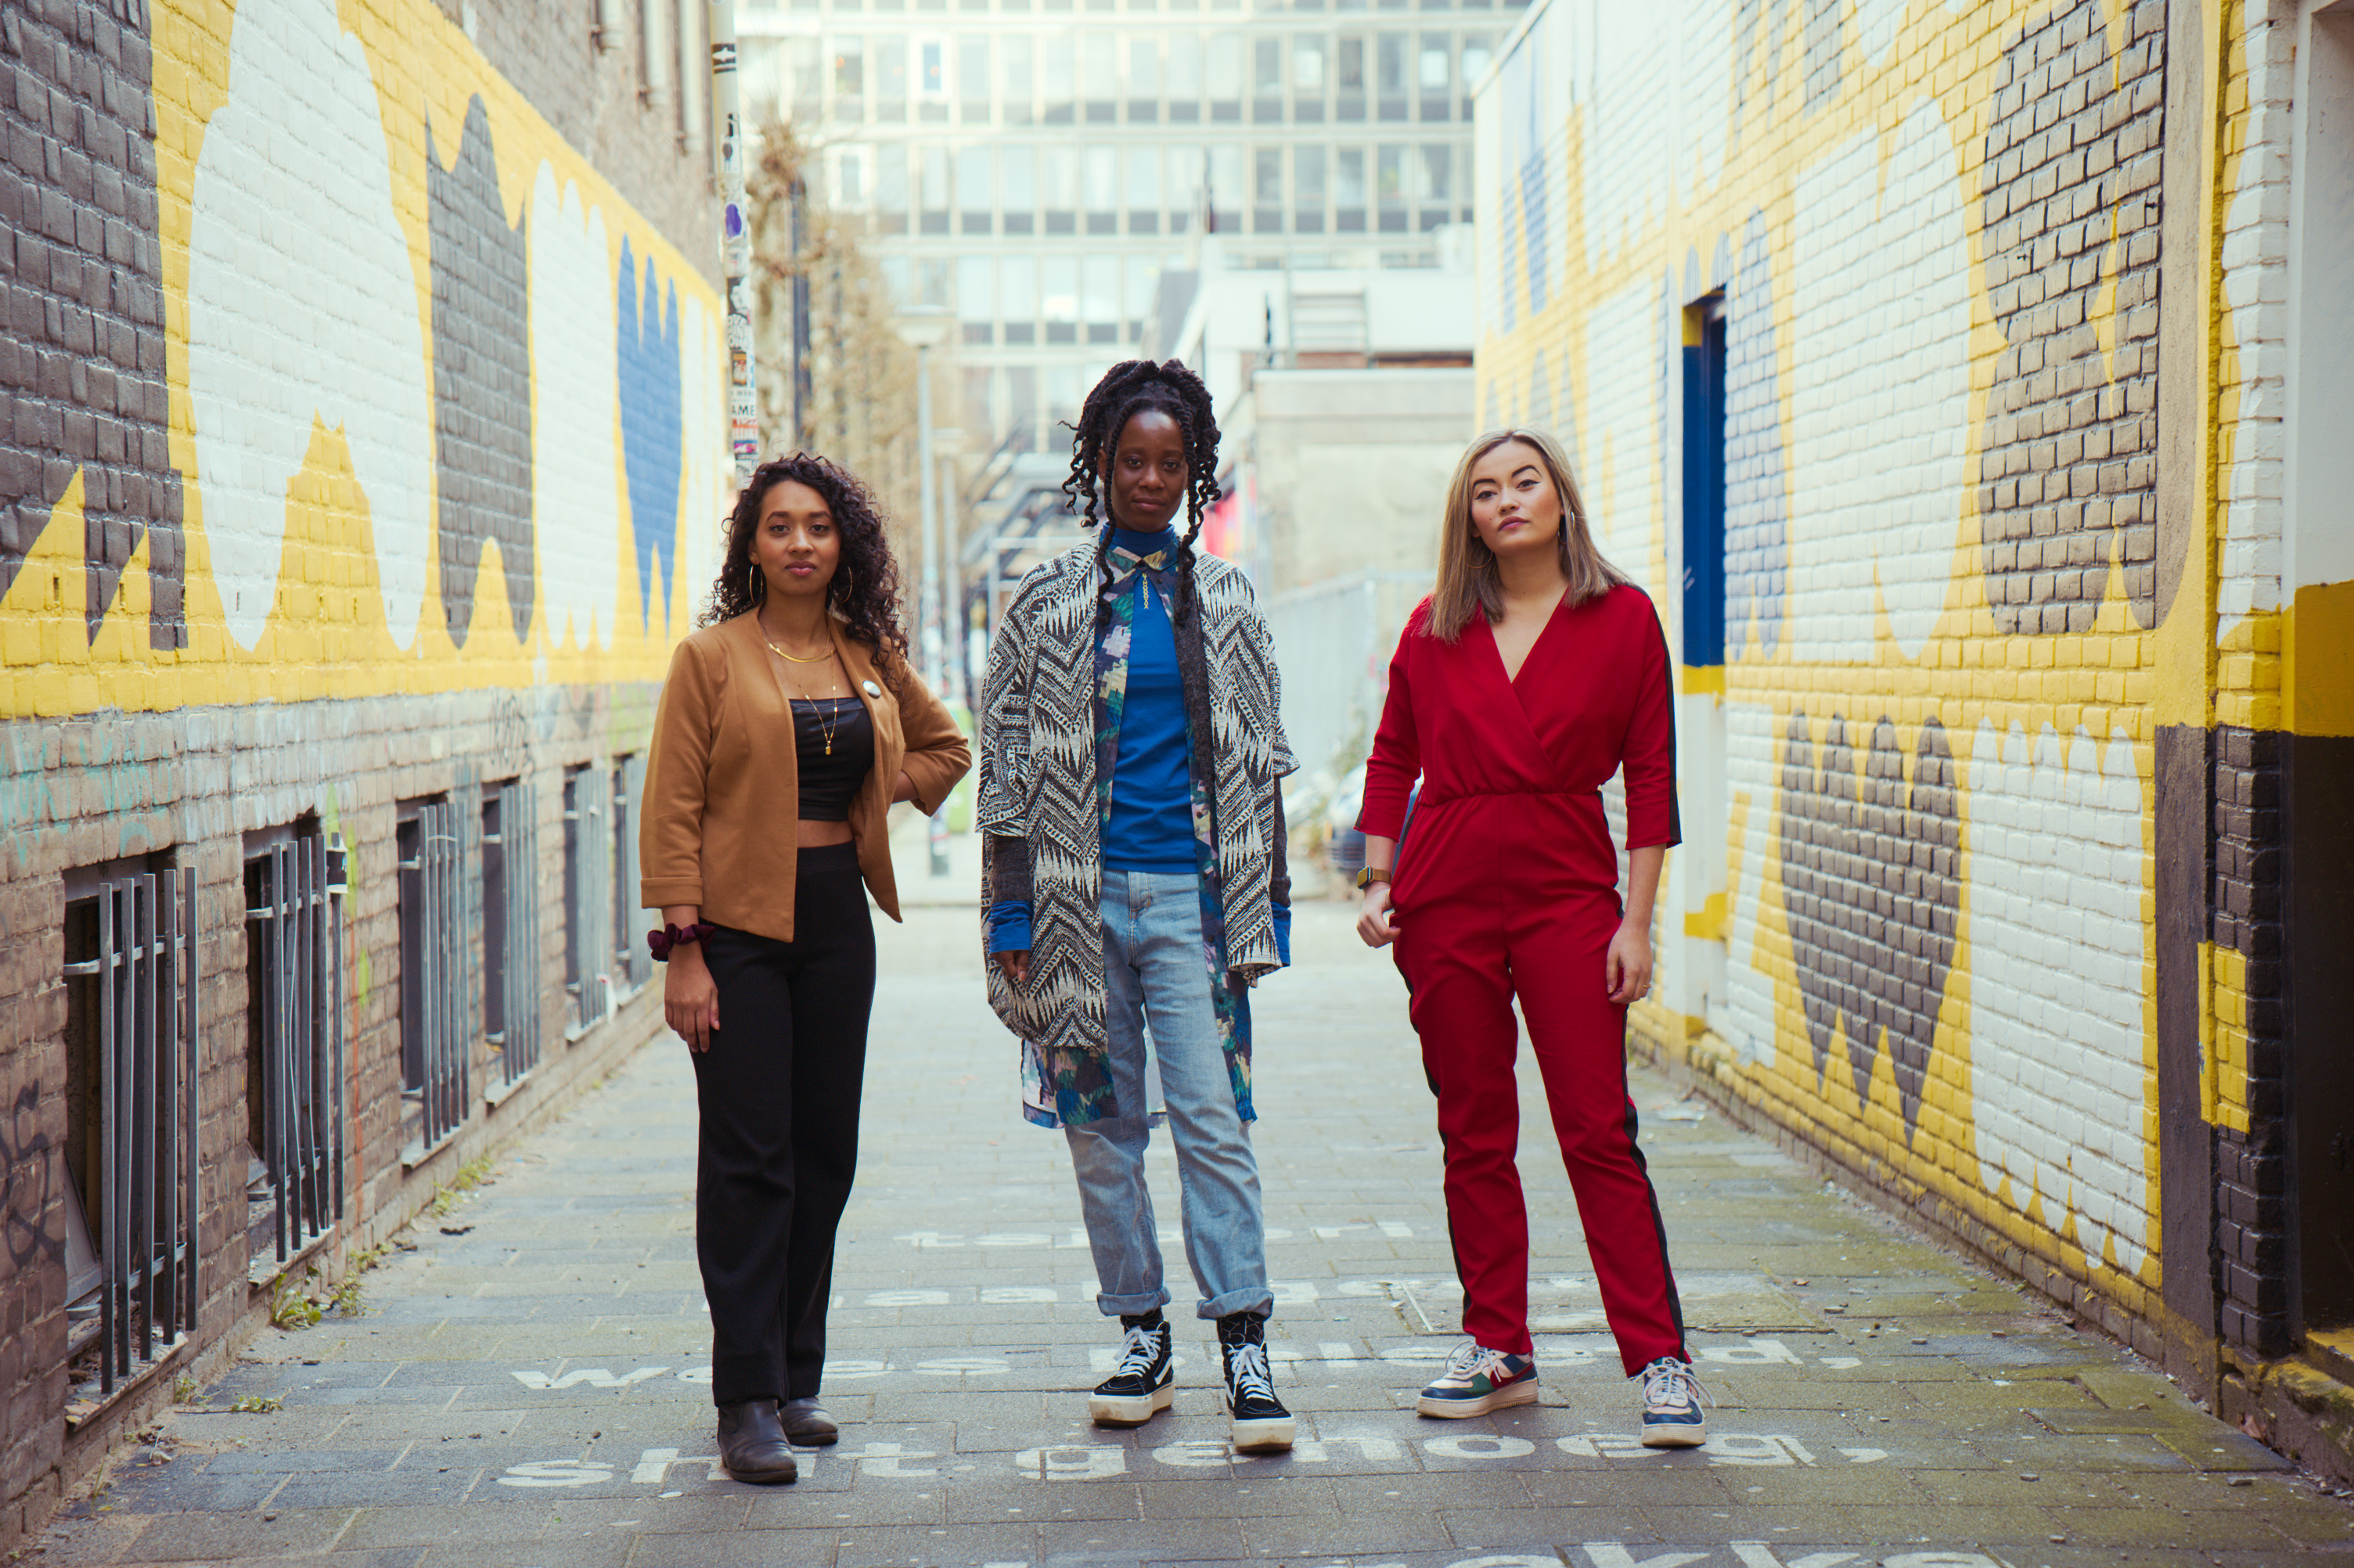
The “Foveon-like” images generally have sharper edges and details (for example, in hair). However, the edges can be jaggier and have false color fringes (especially when they were shot with cameras that have no antialiasing filter in front of the sensor).
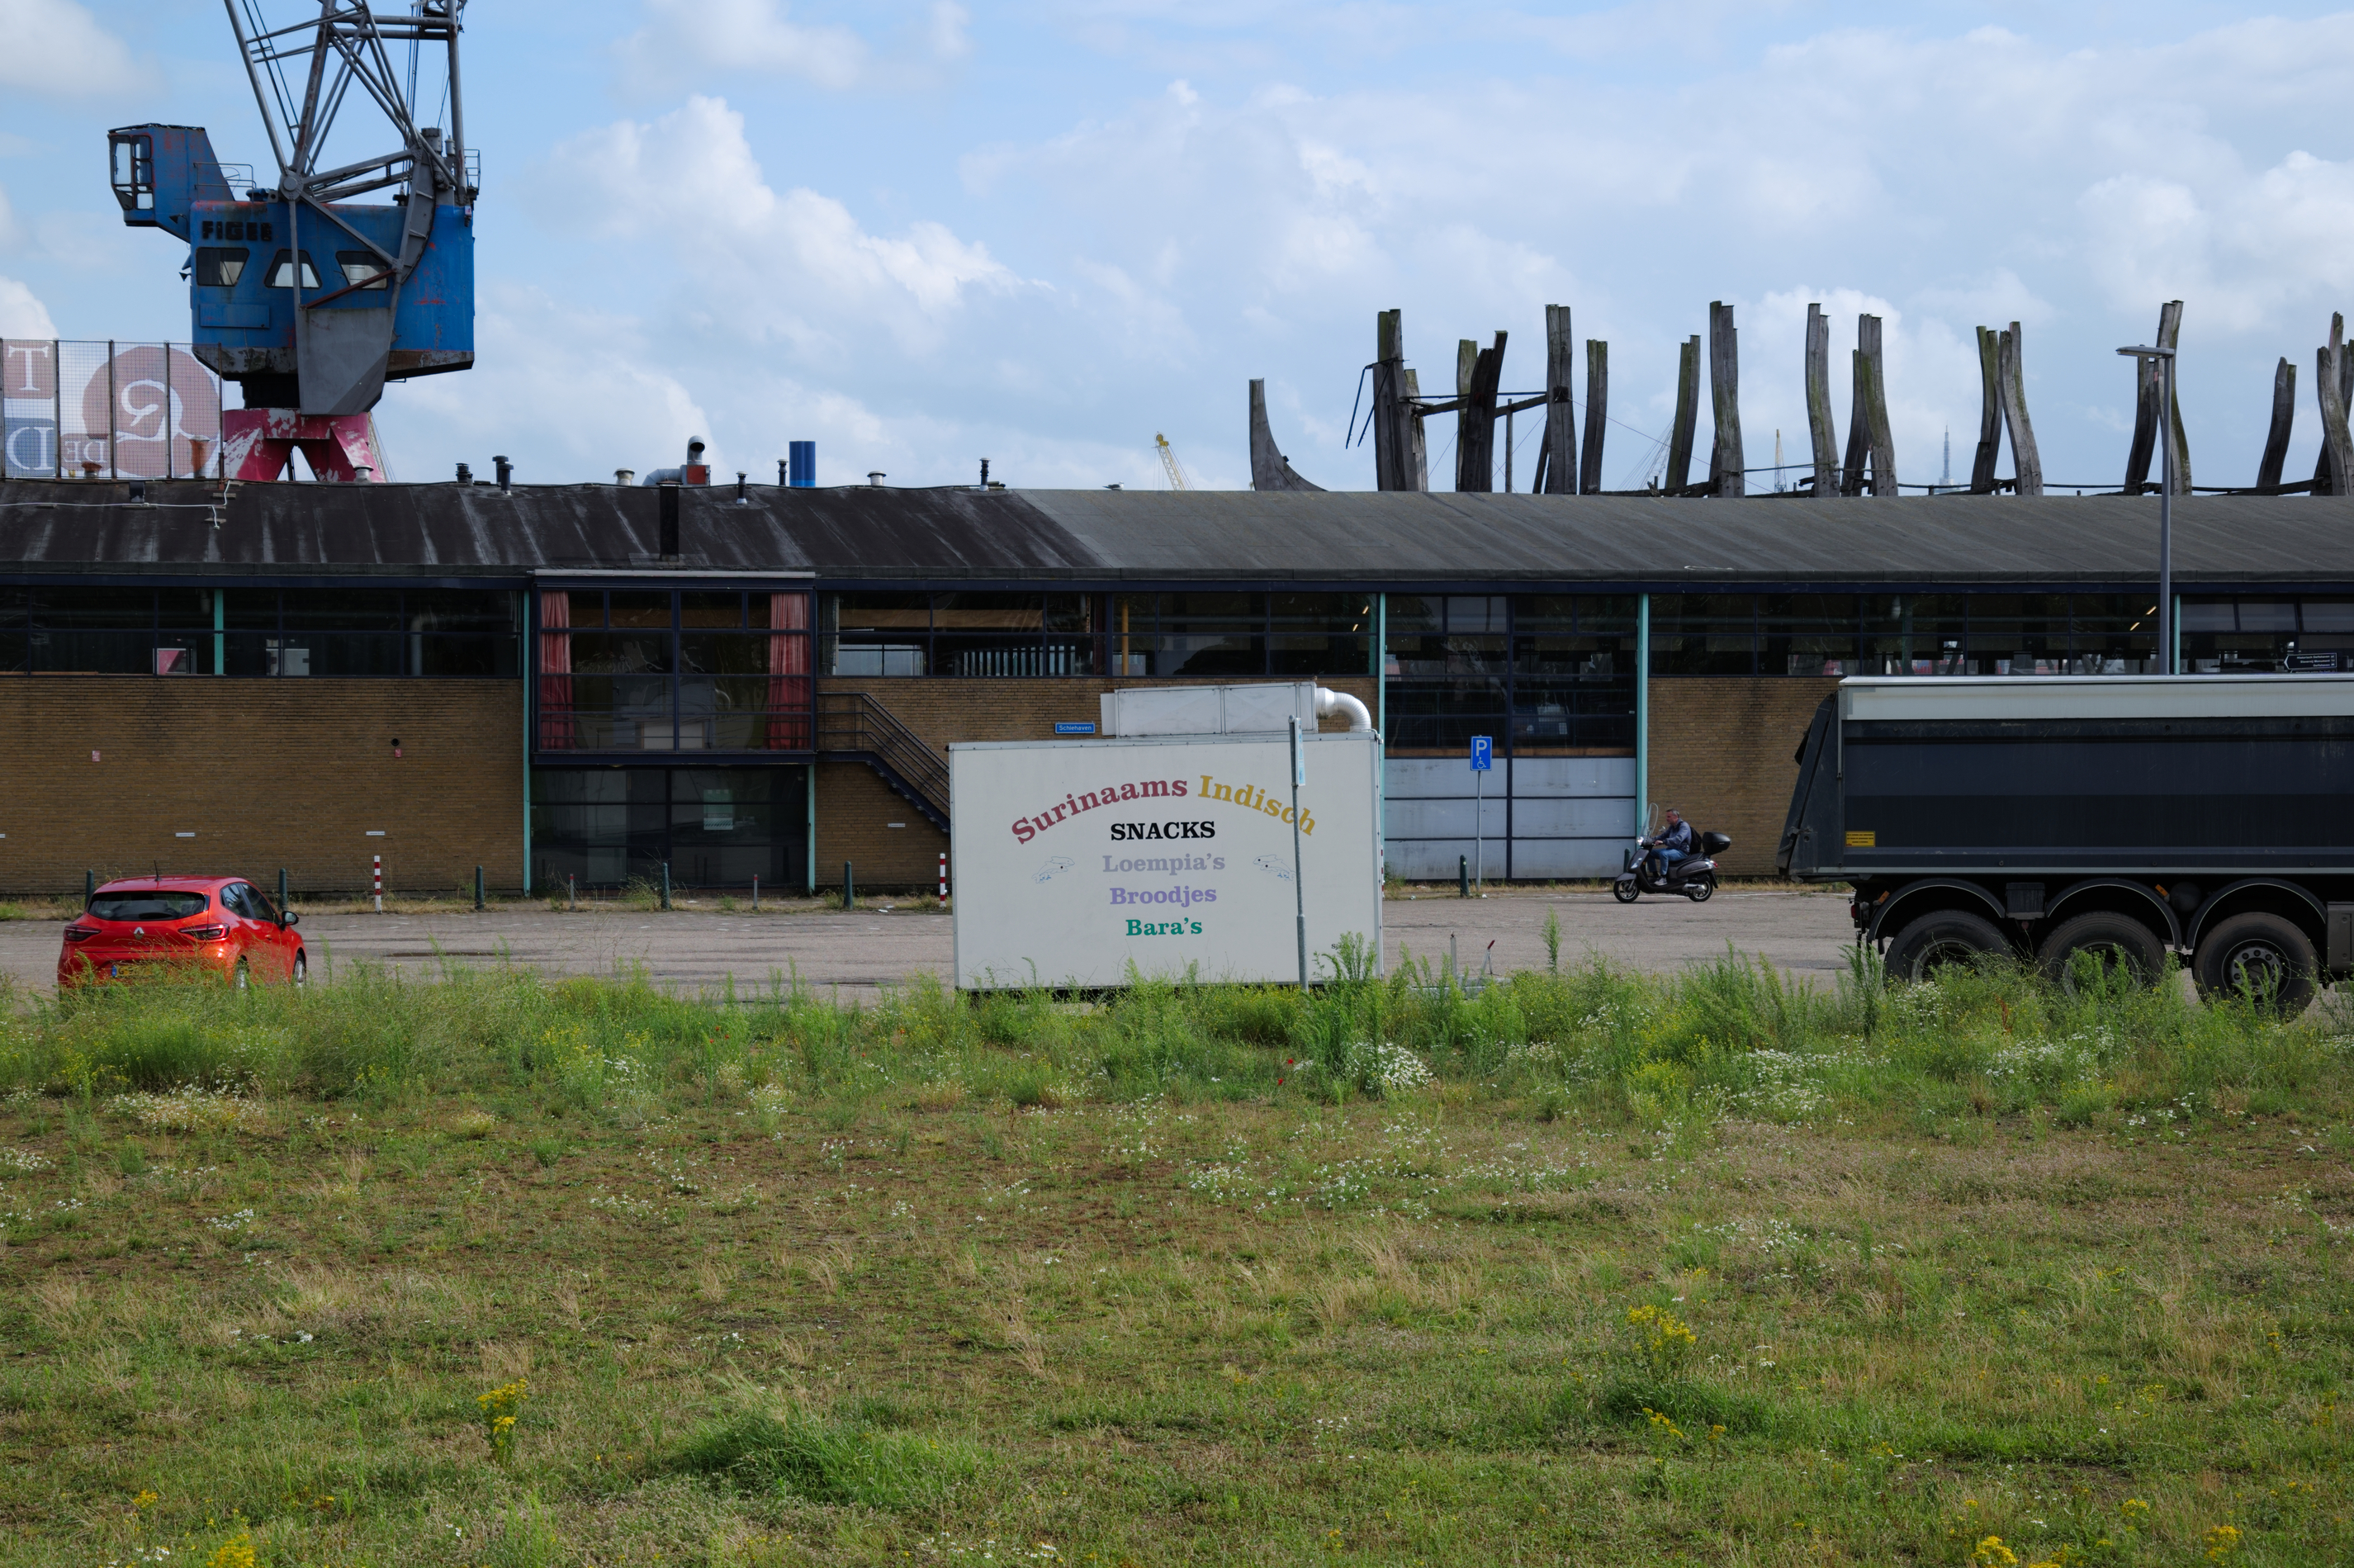
The “Foveon-like” images tend to have better color differentiation and contrast, especially when the subject contains small, neighboring objects with different colors or shades of color. This is particularly evident when photographing grass, where conventional debayering produces an almost monochromatic green, while the alternative process better differentiates the green of leaves from the reddish brown of trunks.
The improved color resolution comes at the cost of higher image noise and poorer roll-off of clipped highlights (since no raw reconstruction of clipped color channels is possible). You also can end up getting pink clipped highlights.
Owners of real Foveon cameras might find some of the above features and issues familiar, especially when they process their raw pictures with third-party software.
For the future, it would be great if this alternative RGB downsampling method could be provided directly in software applications (for example as part of libraw, the Open Source debayering engine of RawTherapee and Darktable).